"Saving Ford's hot hatch from becoming a fridge"
A resource site for owners of the Mk1 & 2 Fiesta

Project Bobcat Ford Fiesta resource site

Full Mk1 XR2 Restoration

Leslie Haire

Author: Leslie Haire | Photographer: Leslie Haire

A huge thanks to Leslie (xr2000) for providing the words and images.

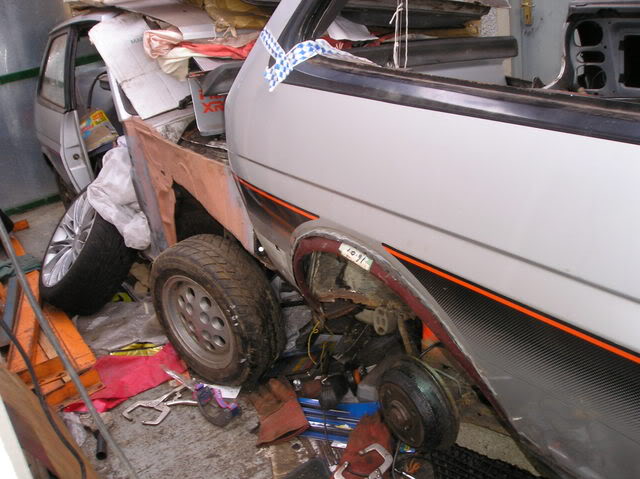
Introduction of the Mk1 Fiesta project car

Strato Silver Mk1 XR2

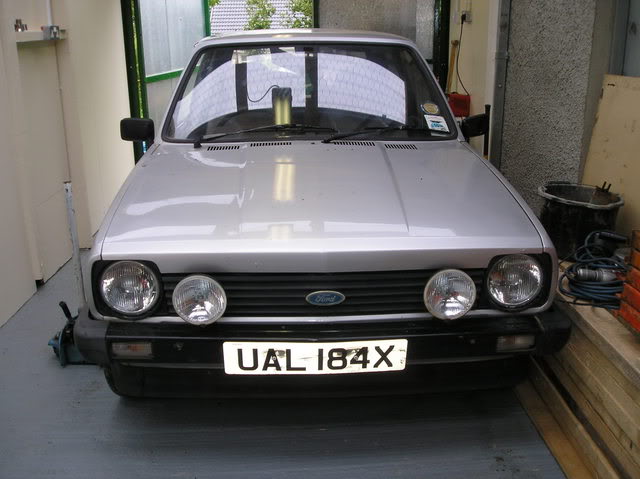
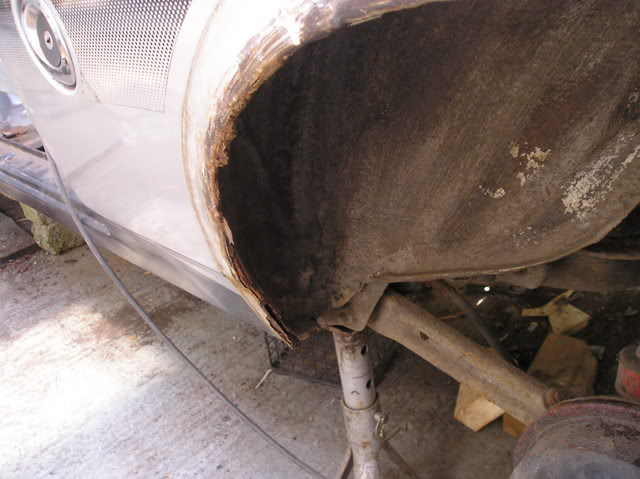
The car looked suprisingly good when I got it but after 18 months on the road with no garage and an MOT looming I decided on a full inspection to check. I knew there was some rot but what I found meant an MOT was totally out of the question

Fiesta XR2 rear chassis rail rot Bracing the fiesta shell to prevent the shell twisting Mk1 Fiesta inner sill to floorpan join rust Fiesta offside footwell rust damage

The car was formerly owned by practical clsssics magazine and when they restored it in about 2001, the owner moved to Revs magazine and took the car with him. Over the next 6 months the car was run as a staff car and recieved a few mods, engine tuning, suspension upgrade, 15 inch alloys etc. Then it was sold off to another guy and I bought it from him about 2 years ago and ran it for 18 months. Just before the MOT I inspected it and immediately laid it up as it was in a bad way.

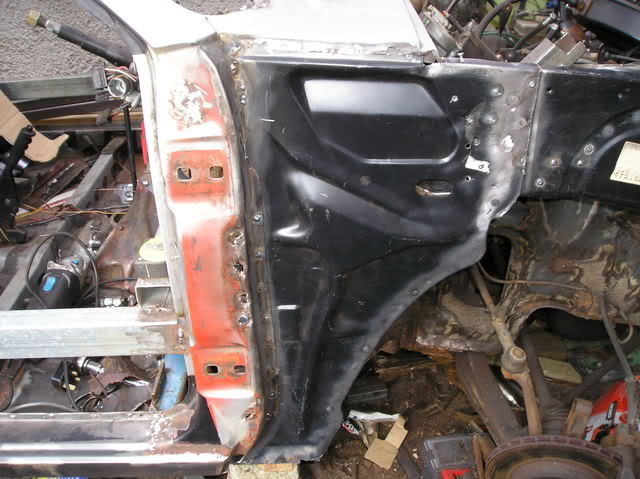
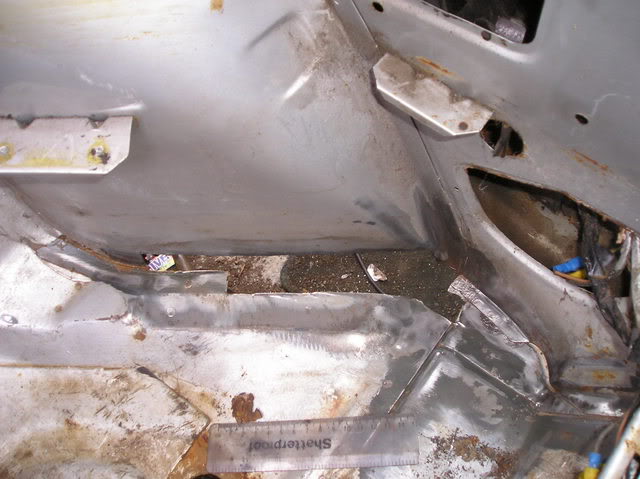
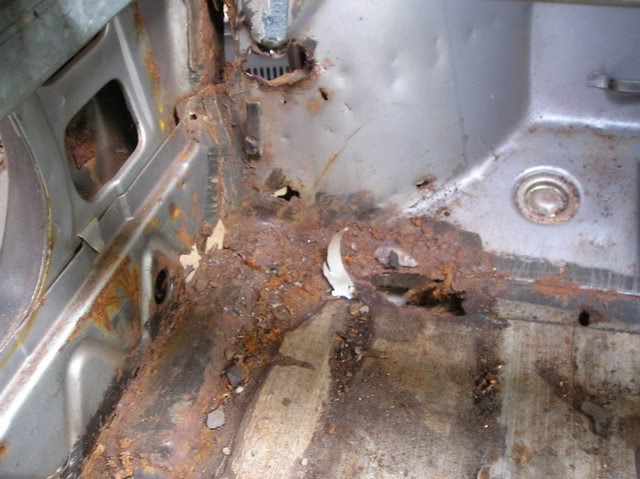
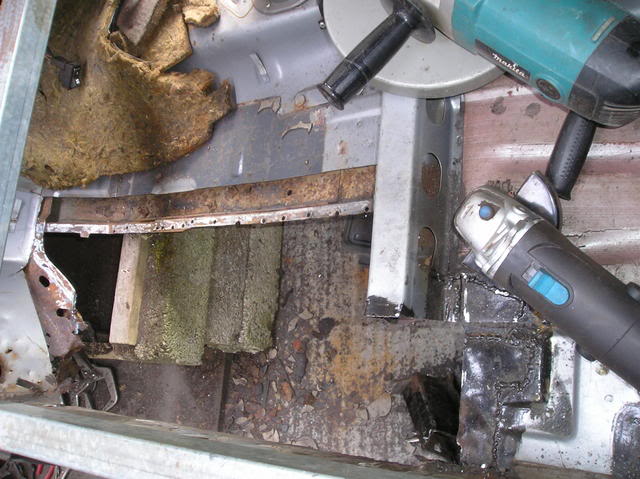
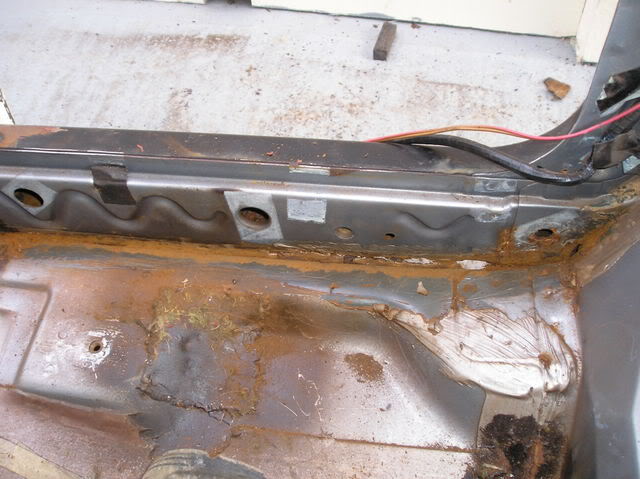
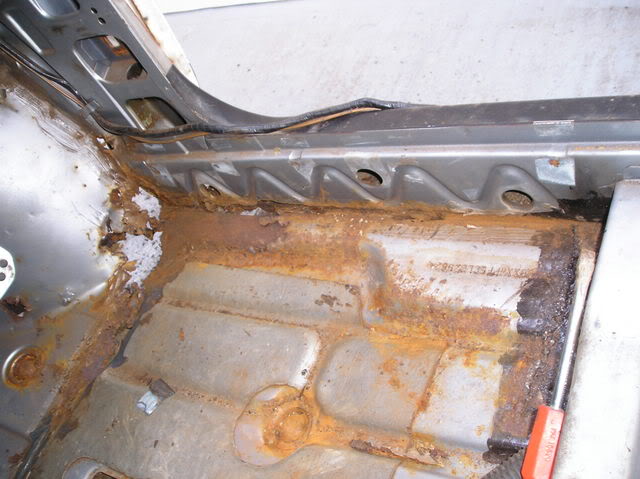
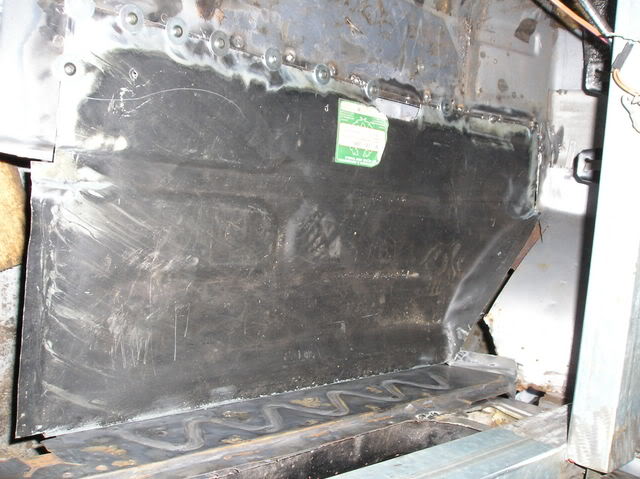
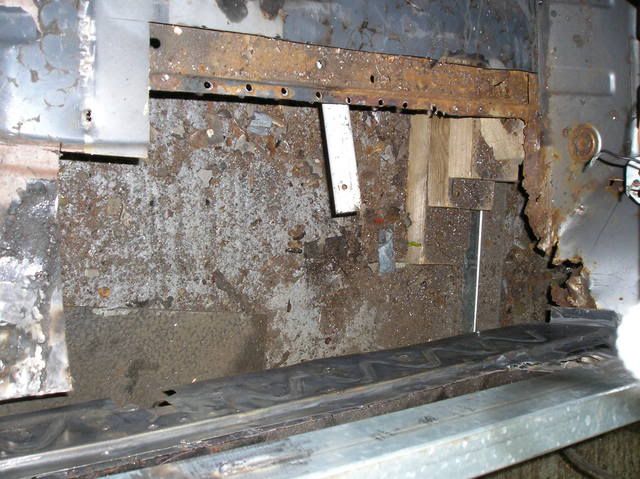
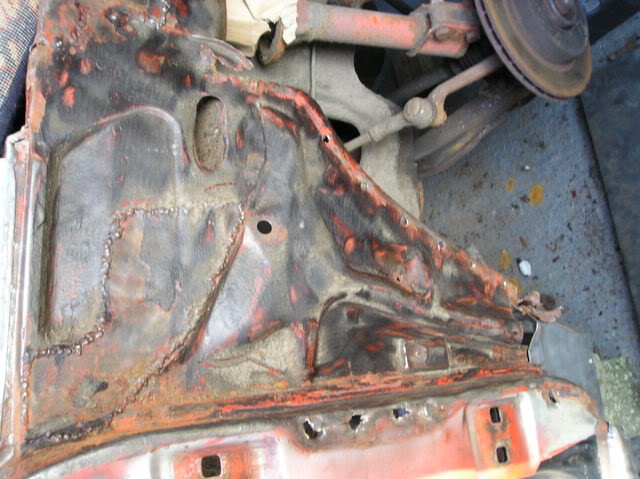
I have pictures on a card somewhere of it after a polish and it looked really good. It literally is rotten all over, I have fitted a drivers side front and back floor Inner sill/outer sill and repaired the seat crossmember. It looked sound in the footwell and sill too until I prodded it with a screwdriver . Then it literally fell on floor in a heap, check out the drivers footwell. Everybody commented on how mint it was but underneath it was a wreck, although 2 winters on the road and it never been garaged took it's toll. It was sound when I got it and passed a MOT a year later although had a lot of patches.

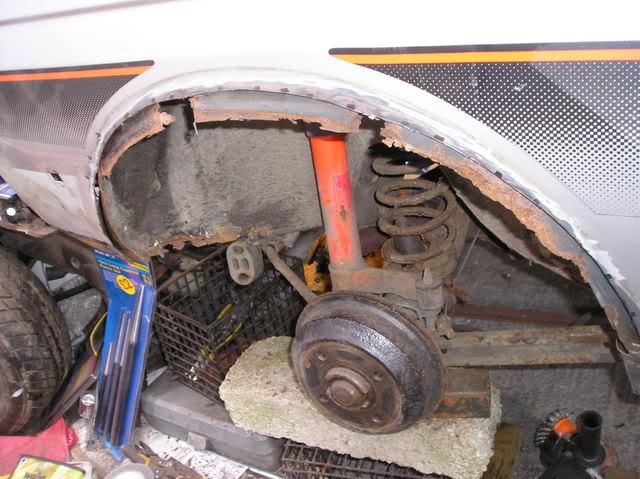
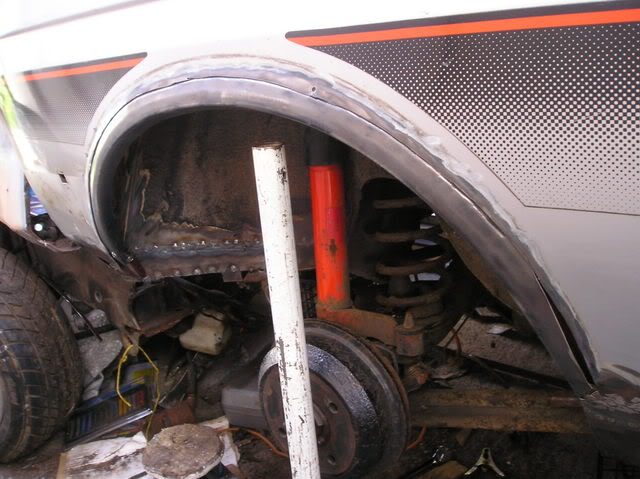
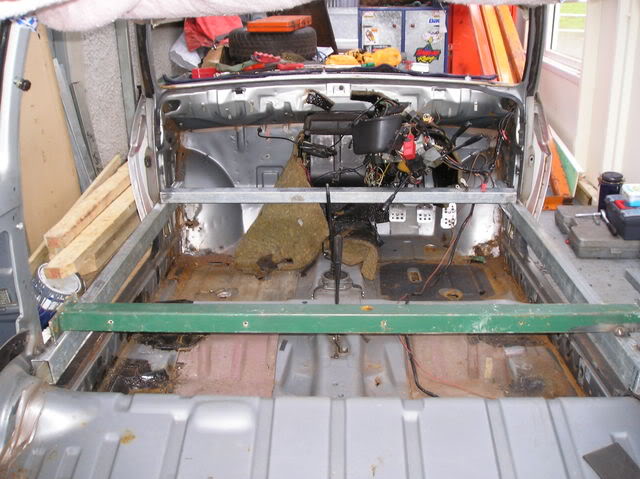
Bracing the shell and the first bodywork repairs

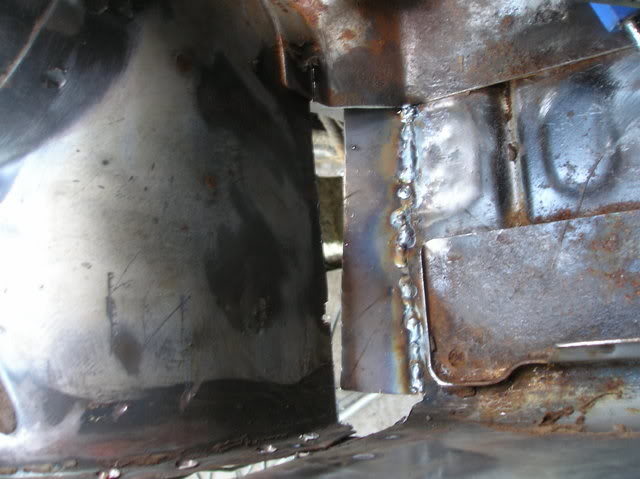
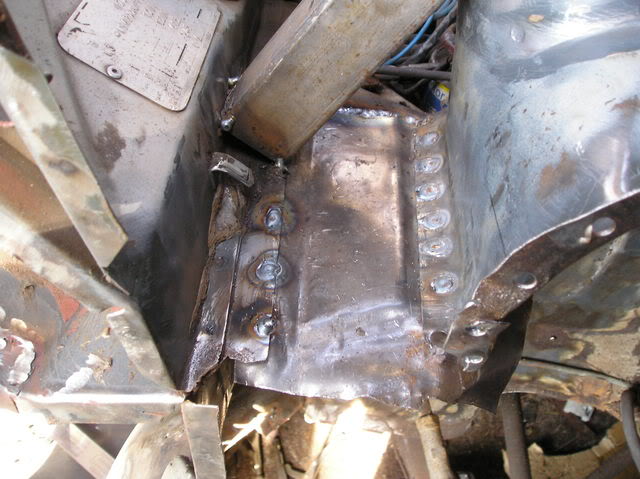
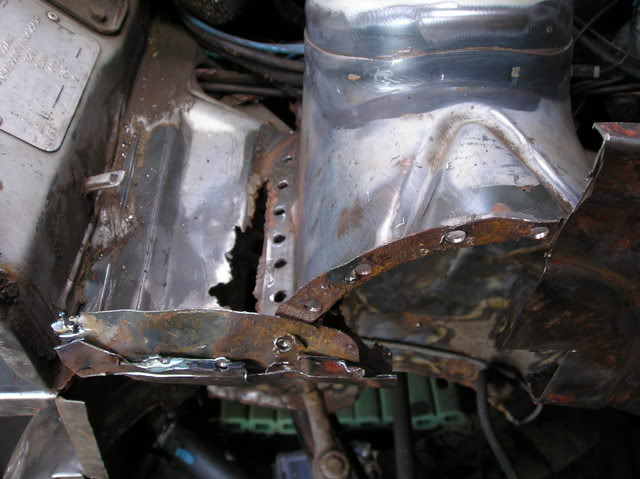
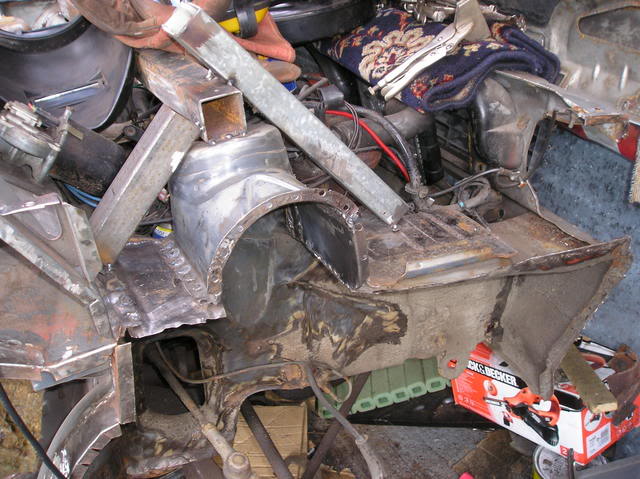
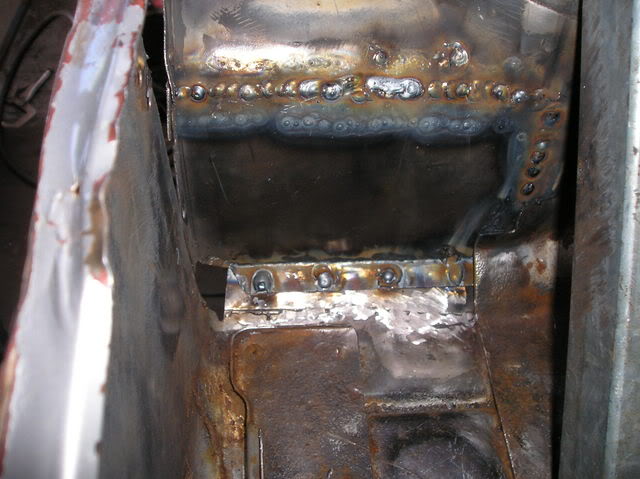
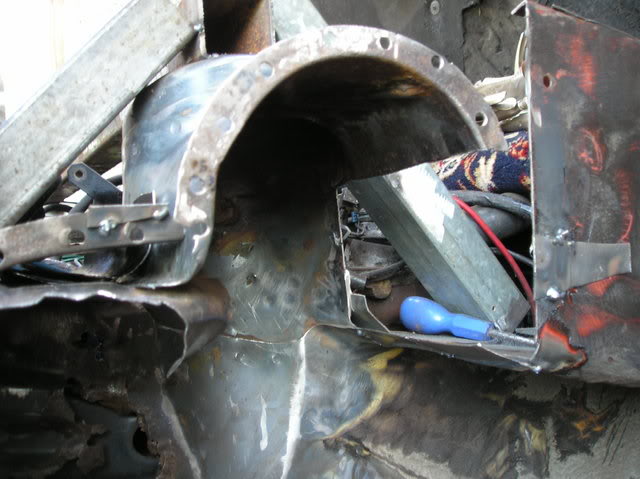
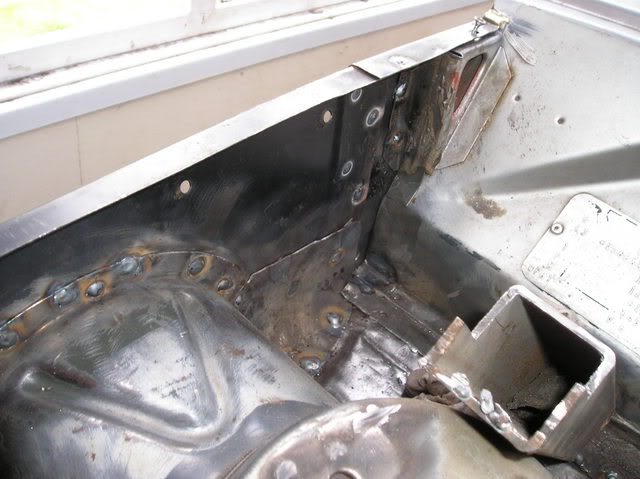
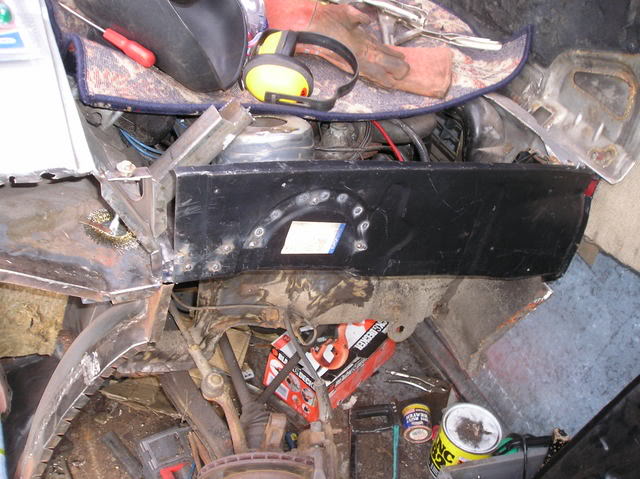
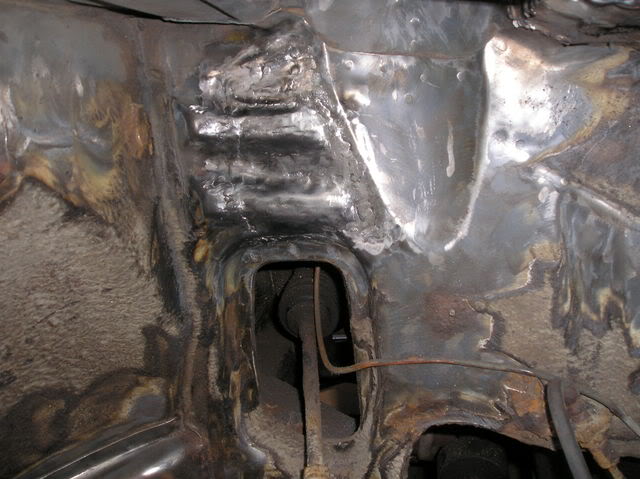
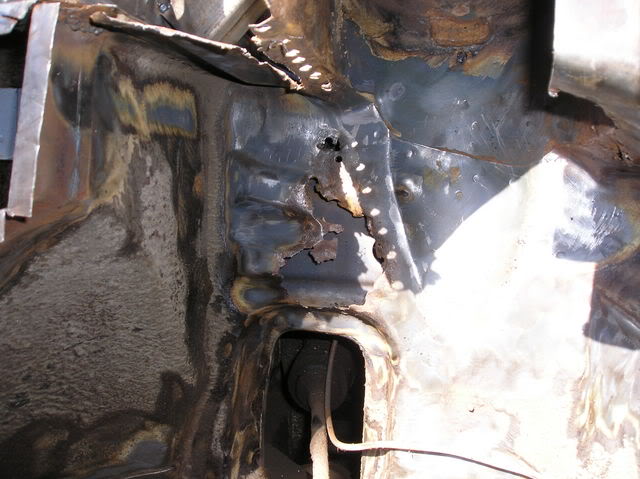
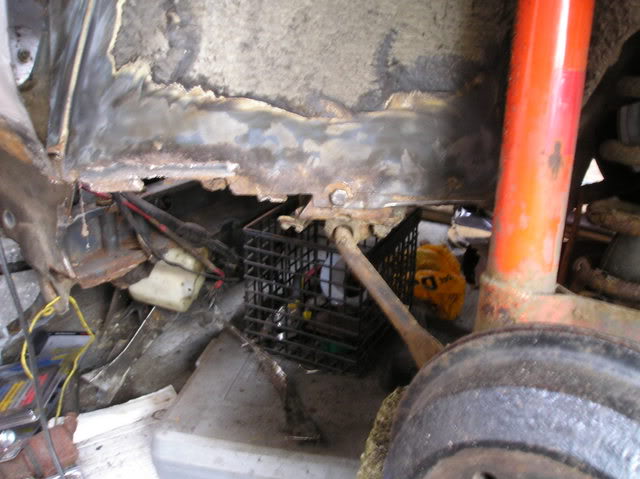
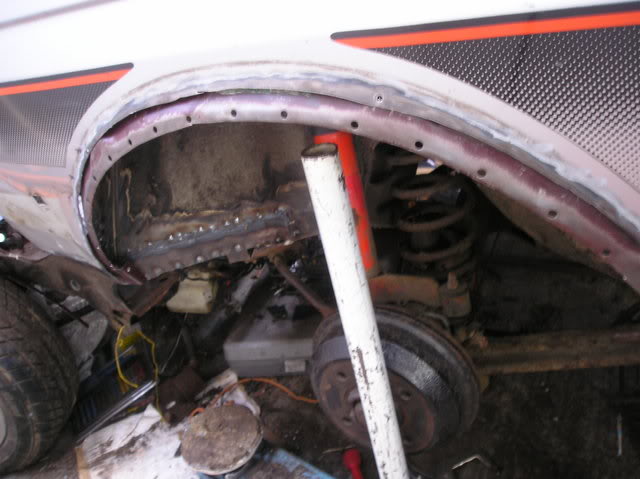
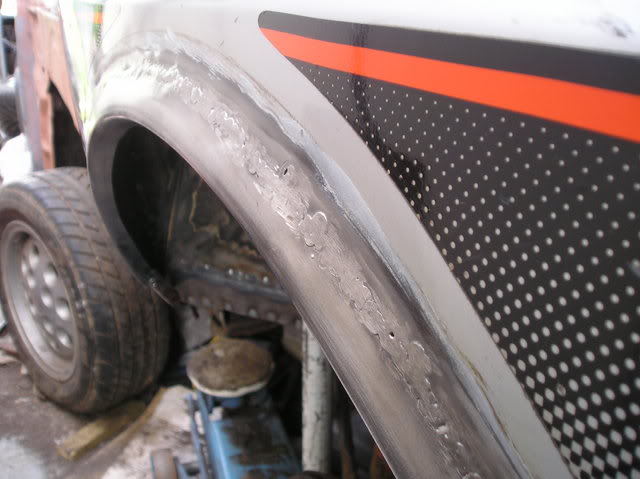
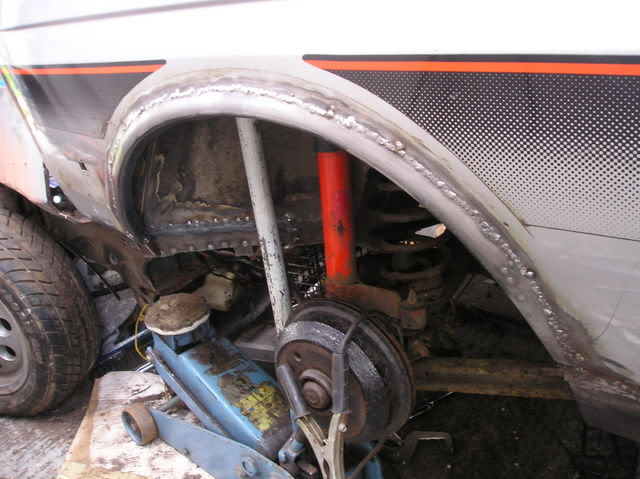
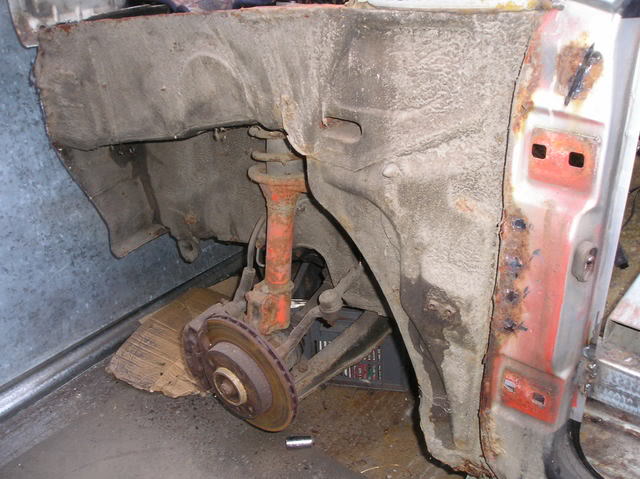
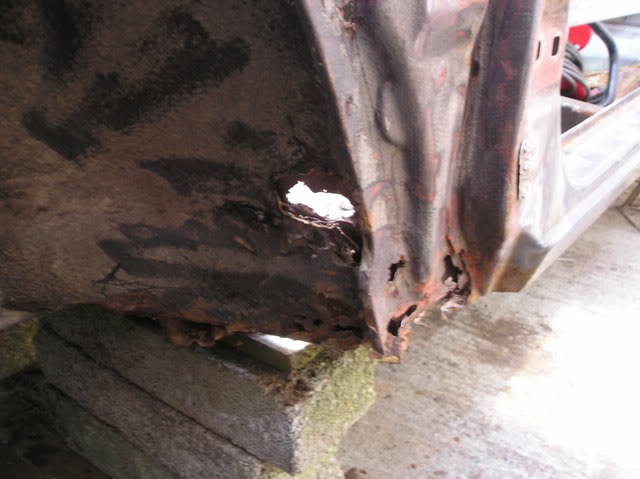
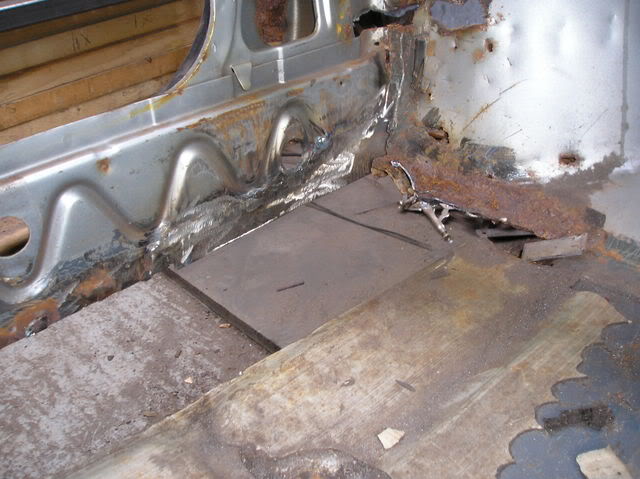
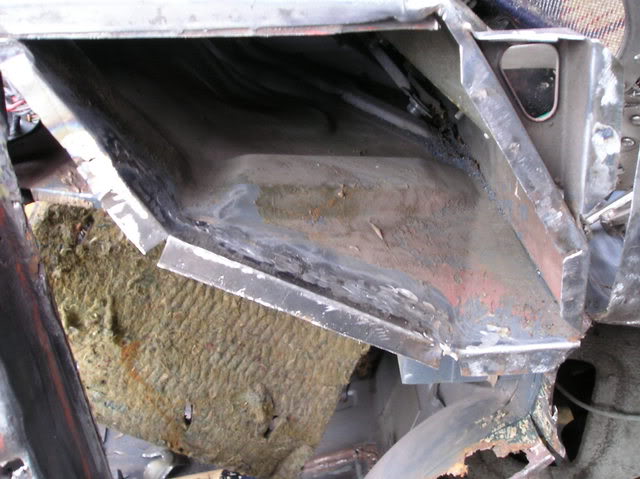
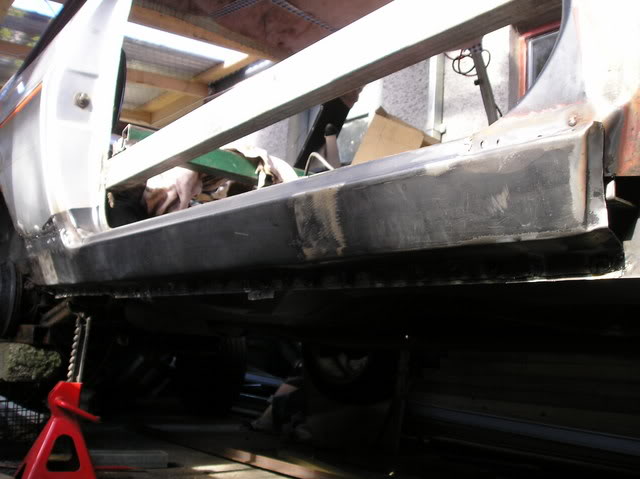
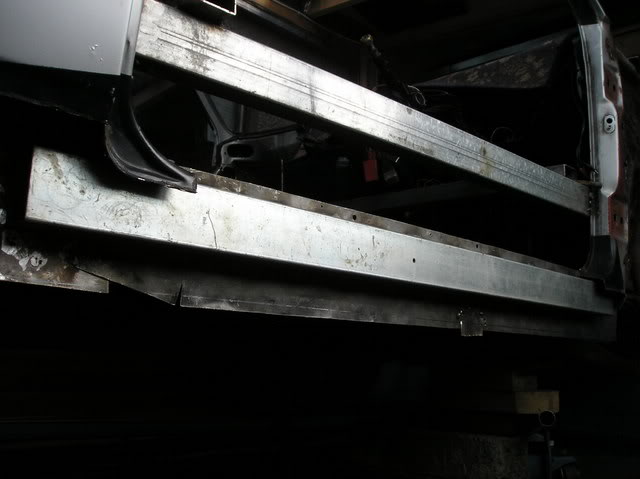
Work completed so far.

welding in of new rear floorpan replacement of drivers front floorpan cutting out the rotten floor repair of front inner arch rust hole in the fiesta inner arch Removal of XR2 inner wing scuttle closure Corrosion damaged fiesta inner wing Replacement outer sill fitted to Ford Fiesta XR2 Box section used to reinforce Fiesta inner sill Welding in the new Fiesta inner sill repair panel Inner sill repair panel and reinfocing box section comparison Bracing of the floor crossmember whilst replacement is carried out

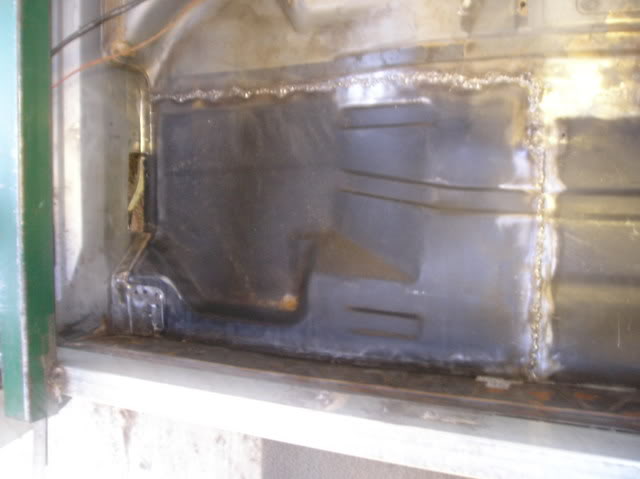
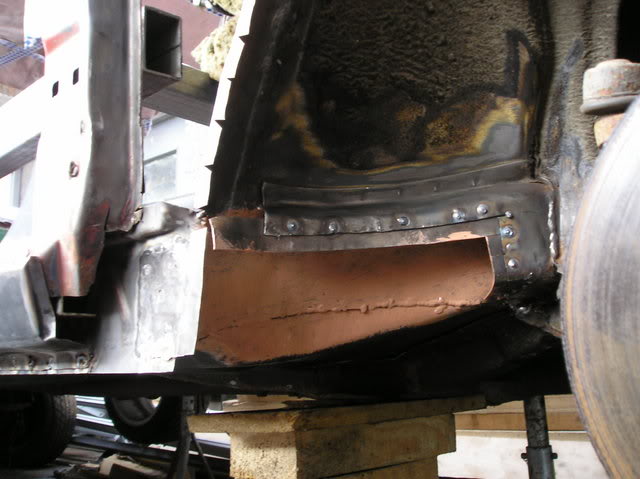
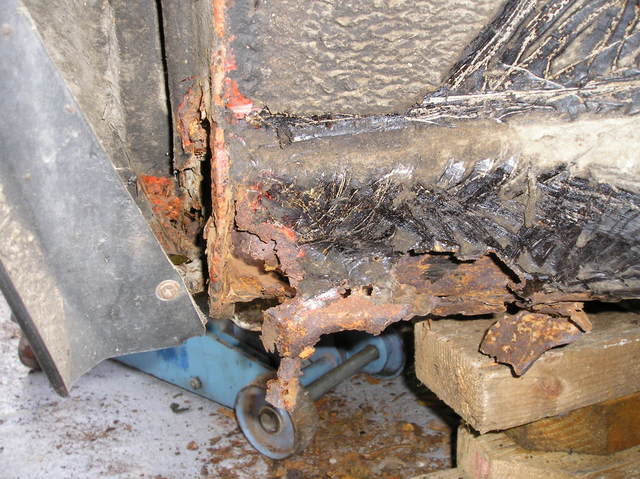
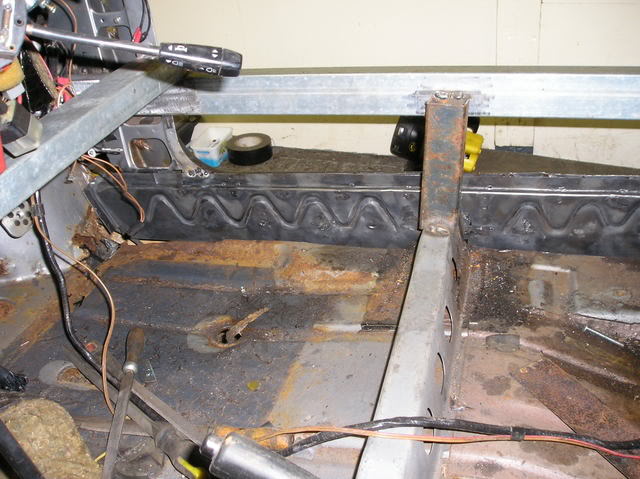
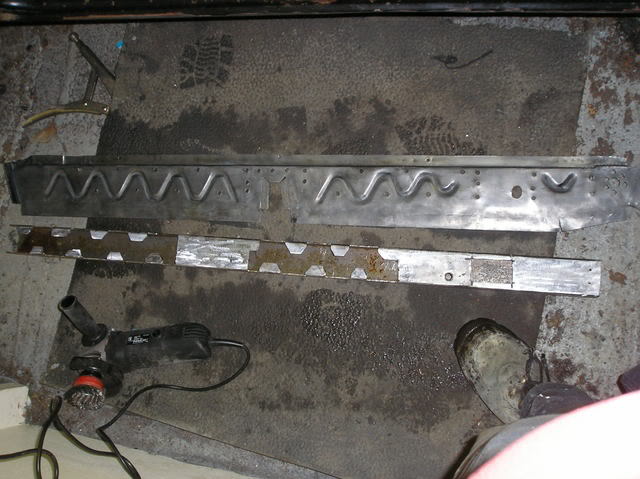
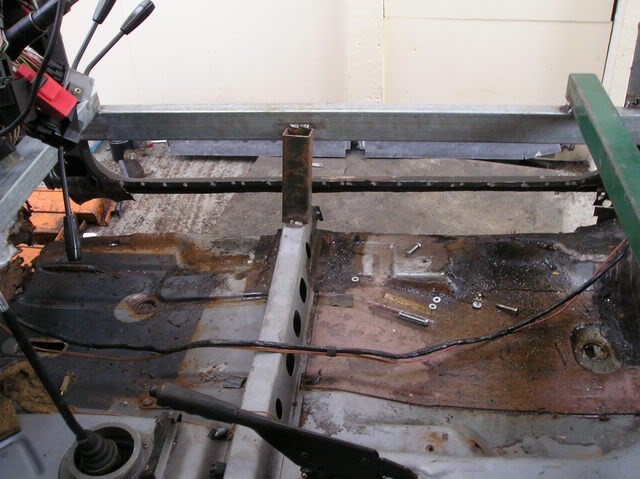
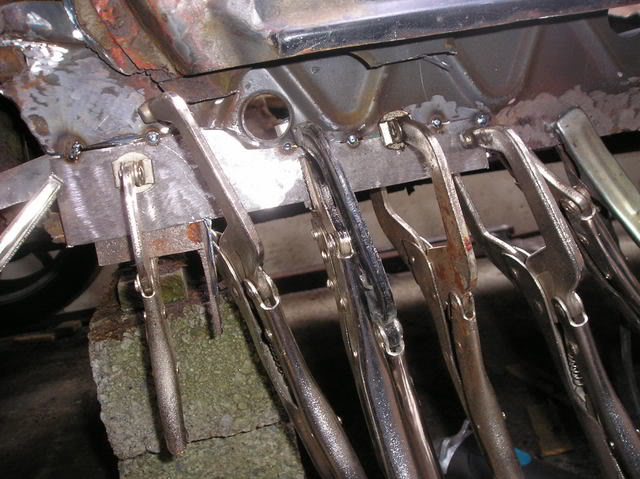
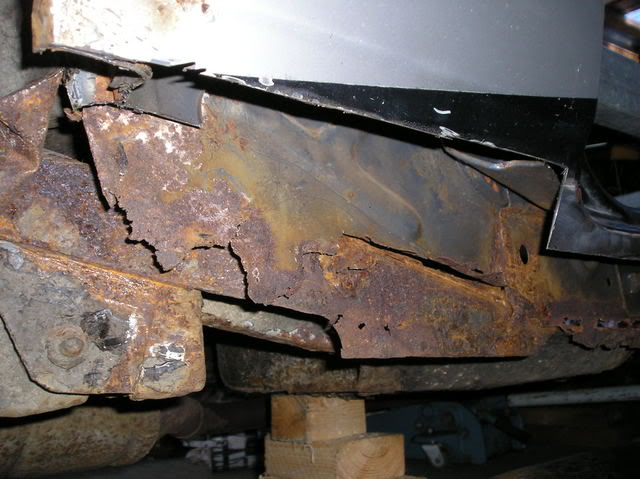
The bottom picture show why I fitted the sunstantial "roll cage" ie to stop the shell breaking when I removed inner and outer drivers sills. I also took the opportunity of reinforcing the inner sill with a substantial box section 2.5 by 1.5 inch steel seam and plug welded to it as the replacement inner sills are too thin and about half the thickness of genuine ford items which I just couldnt get anywhere.Was tempted to repair the inner but it was rotten past the curved pressing all the way along so would have been very hard to make good.I have now reached as far as the strut tower and it is fairly bad.

Repairing the strut tower rot

Mk1 Fiesta Strut tower repair welding the strut tower from underneath Plug welding the fiesta inner wing Some of the rust that needed to be cut out

I have got to work in the strut tower and after some poking found more rot which I have cut out and replaced.It took quite a while to get the repair piece for the left side of tower to the correct shape.

More patching .I just cut back until the rust stopped.Almost ready for the wing mounting rail.

Temporary bracing of the inner wing whilst the upper panel is removed Image Image

After all the small patches thinks are starting to take shape in the inner wing area.

Image Image Image

I want ALL the rust out and believe me there is a lot of it. The strut tower was thin and pinholed so just cut that piece out .Its the best way. Buy the time I am finished the car will have a completely new botton 6 inches,Everythink ive done on the drivers side will have to be done on the passenger side.Although I will be repairing it so that when the welds are cleaned up it will look as close to what ford intended as possible.Did I mention the rust goes up to the roof?

Fiesta inner wing and rear quarter repairs

Image Image

Here is a repair I made for the inner wing.It was difficult to make .At first I tried in the vice but gave up and made a jig from wood to get the folds right.If only inner wings were available.Only last week 2 left hand full inner wings were on fleabay.Of course I need a rightside one.

Image Image Image Image

I then proceeded to the rear wheel arch.I had hoped to just replace the outer arch and weld the inner arch too it as I had seen in classic ford mag and leave the area single skinned as less rust prone but as is the norm on this car the inner was like a teabag and I had to cut up to 3 Inches of it out. I trial fitted the inner arch but im repairing the area in the boot before fitting it as it is easier to access now. As you can see in one of the pics another xr2 has joined the party . I've had it since 1997 and driven 3 miles in it in all that time. It even had fsh and a genuine 48k miles but had a bit of rust).

Tackling the rear arch

Got the bootfloor corner welded in before trying to sort the inner arch.

Image Image

Ive now got the outer arch set in place ready for welding and the inner arch tacked on for now.It was one of the most difficult unpleasant jobs.With dirt falling into my eyes etc.I lapped down the outer arch so hopefully the repair will be flush when welded.Unfortunately I made a mistake when measuring and at the front of the arch the repair arch is 5mm short. I cut the flange of the inner as I couldnt get the outer to sit correctly no matter how hard I tried so the arch will be single skinned and hopefully less likey to rust.Thats all for now.

Arch welding

Image

The arch punched for plug welding to the inner arch later.

The arch fully welded up which took a few hours to do slowly to avoid warping as much as possible and they roughly ground down.It has turned out quite well and my welding is certainly improving .It will be finished later with a soft pad but will do for now need too keep moving.It has taken me most of the day to sort this.

Image Image

The passenger side gets some attention

I moved the car over to get at the passenger side as driver side is mostly completed for now.I removed the passenger wing today.I tried not to reck it as was quite good.Found a few more hole to fix.Looks like the passenger side is as bad as the drivers side was.

Image

Didnt look to bad did it.Well look at these closeup pics .It is a rotbox..Looks like a lot of work.

Image Image Image

Would be good if I posted the pics first.New arch and sills and floor all much needed.

Because it was in two magazines I have a soft spot for it and believe me I thought a fair few times about scrapping it.All the other mk1 xr2s ive had have been minter shells by comparison.Although this one looked by far the best on the outside.Beauty is only skin deep as they say.

Crusty Sills

Image Image

Just a small update as only had a few hours today.I cut off the outer sill and a portion of the front passenger floor to get at the inner sill.It wasnt as bad as id feared and I decided to patch it as the repro inner sills are too thin.I got the patch welded into the front of it and it has closed up the hole nicely (compare with last pic of inner sill.)The fan on the mig stopped to but has started working again.It may not have long left.

The cutting continues

Image

Removed fuel tank as although I had run the car dry and put a gallon of diesel in it was still worried about FIRE.Then cut out the rest of front floor and a bit of the seat crossmember.It had been welded and welded on top of that . In the end I employed the 9 inch grinder and even then due to access etc it was a wrestling match to get it out. I also turned the outside flange down as original (the hadrian panels fold up at the inner sill) and trimmed the panel so it will join inside the chassis leg and not be seen from underneath. I had hoped to be further on but fitted xenons/angel eyes to my daily driver 330d and this took a while. Will do more tomorrow I hope.

Add a Comment

Page Last Updated: Monday 18th of June 2018