›
› Yellow Track Mk2 Fiesta XR2 Project
Yellow Track Mk2 Fiesta XR2 Project

Author: Robert Saunders | Photographer: Robert Saunders
Dial wiring
20th July 2005 • 02:26PM
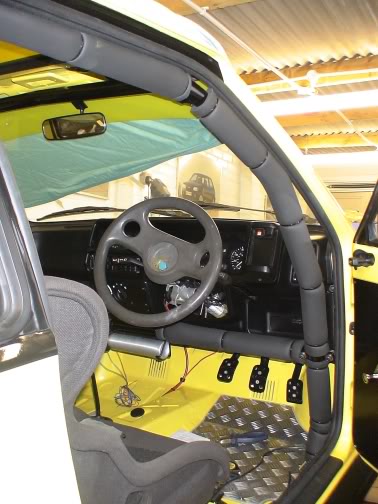
Just a small update as yesterday I finished fitting and wiring up the clock's and extra dial's. Just need to get power into the car to make sure everything's ok.
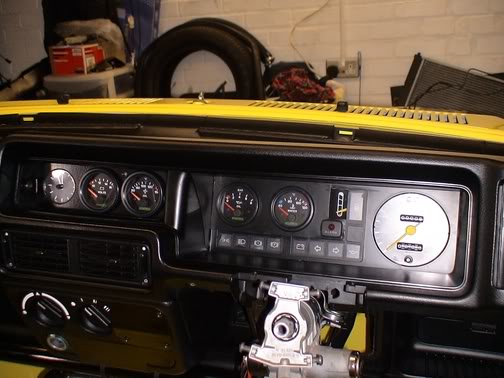
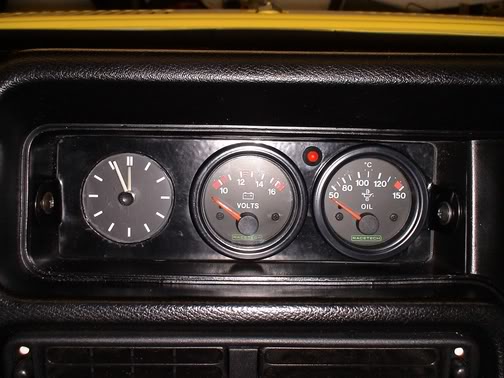
They are from left to right; VDO Rover analogue clock, Racteck volt's, oil temp, oil pressure, water temp guages. Original XR2 fuel guage, and a RS1600i speedo. I've also fitted the immobilizer light into the extra mount, and the Rover metro alarm light into the clock assembly. Can anyone suggest the size cable I need for the main battery cable's? The battery is going behind the passenger seat, and will run thru the car to the starter.
Enging build
24th July 2005 • 07:19PM
Saturday I thought I would have a look at the engine. I had split the head of it month's ago as I thought it may of had a weak head gasket. I was then having trouble getting the bottom pulley bolt off as the crank wanted to turn. I found a way of locking that, and with a good blow to a spanner the bolt came loose. I've now painted the block black, and started to bolt on me new part's.
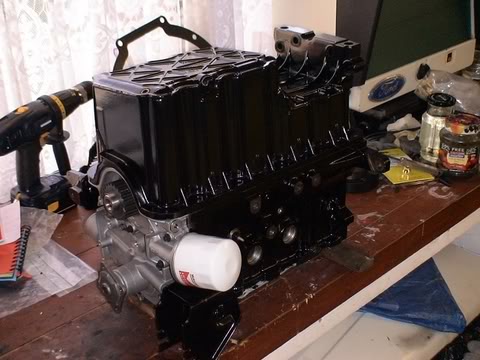
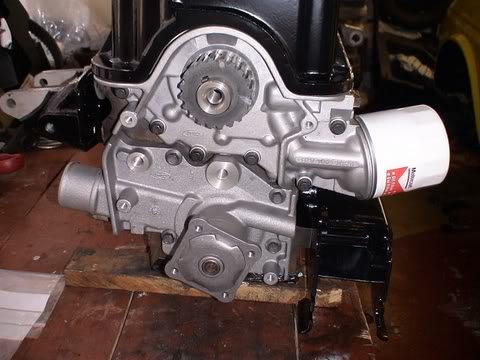
So far i've fitted the new Ford Motorcraft 1.6/1.8 water pump & oil pump (with pickup pipe). Modified top engine mount, and the cvh alternator bracket. The 1.8 zetec sump (powder coated satin black) is on the engine but as yet not bolted down as I need to get some stainless bolt's for it.
As I mentioned above I fitted a battery into the car to try the gauge's, and check out the light's. Most thing's worked ok, i've got a bit of a problem with brake light's but apart from them it all seems fine. I was just glad the loom did'nt start to fry as it's been modified a fair bit. More to follow soon.
More progress
28th July 2005 • 03:45PM
Latest update time, I've been splitting my spare time between working on the shell, and the engine. The bottom end of the engine is basically back together now, and looking very nice it is to. Next stage is to have alook at the head.
I've fitted a few item's onto the shell. There is'nt much more to go in it really as im keeping it stripped out. But here are a few bit's fitted the last couple of days;
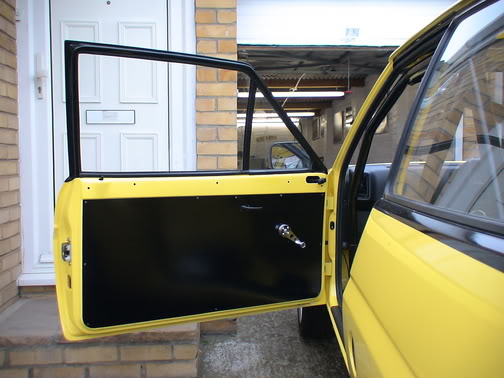
Door cards.
These are made from 1mm thick alluminium and powder coated satin black. Held on with small black self tappers. As you can see all that's poking thru them are the latch handle and the alloy window winder. I will be fitting a alloy handle to the door so it can be pulled closed, this will probably go onto the yellow top section of the door. But I wont be done until I put a seat inside the car to get the best position for the handle.
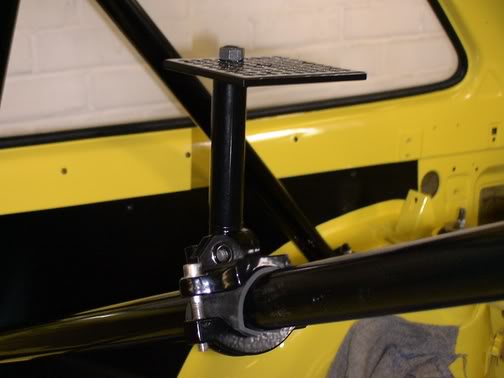
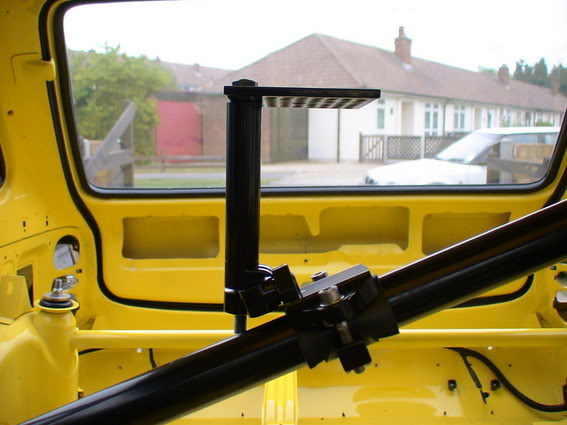
Video camera mount.
I've made two of these from bits and piece's of scrap alloy, and alloy scafolding I found at work. Very rigid, and mounted with rubber around the cage and also a piece will be fitted under the camera. The camera can be screwed the the top plate facing front or rear and the mount is fully adjustable for angles.
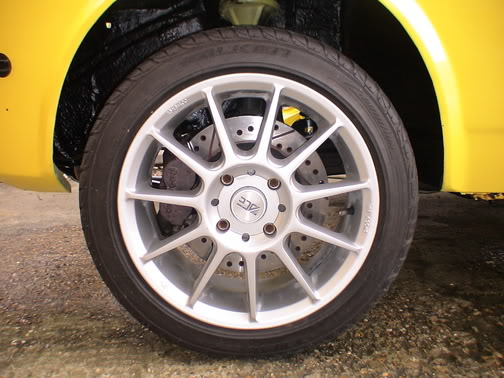
Alloy wheels & willwoods.
These will probably be the 15" wheels that will be used when out on the track (with proper trackday tyres fitted). They have loads of clearance around the larger disc's and the willwood 4-pot's. I will be getting them powder coated satin black as silver wont match the rest of the car.
RS200 seat and various other parts fitted
6th August 2005 • 03:52PM
Well as this morning I was getting my blue xr2 ready for fordfair, I thought I would get the yellow one out and take some snap's of the latest item's to go on it. I fitted in my one and only seat into the car so I could get the position for the handle for closing the door. I bought a pair of alloy handle's that were for a mini as they also matched my window winder handle's.
The seat is a genuine RS200 item. Very, very light as it's made from a kevlar/carbon mix. It bolted straight onto the original mk2 seat runner's but I had to make up and fit some alloy blocks to go between the seat and the runner's to get the right angle as it was tipped back to far.
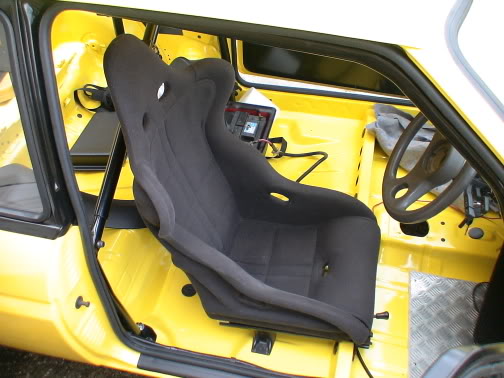
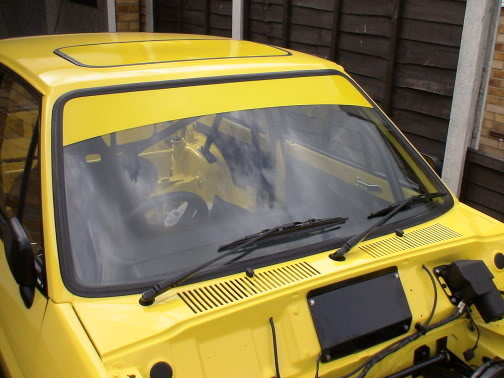
I've done a bit of research into the seat as there is no name on the seat. I have now found they were made by Sparco for Ford to fit into the RS200. They also did them in red. I will be fitting a passenger seat into the car, but the chances of finding another one of these is going to be slim. I had the frontscreen put back in friday, now the car has a full set of window's. Sunstrip is done in the same vinyl as the sunroof by C.Foster. I've also fitted brand new genuine Ford wiper arm's and a pair of bosch wiper blade's. Also in the picture you can see the alloy satin black powder coated blanking plate for the bonnet catch plate. Catch not needed as im using a fiber glass bonnet with pin's.
I've also modified the handle for the sunroof as it was'nt closing flush with the roof due to the polycarb having so much flex. I made up two nylon spacer's to bring the bracket down so it now pull's the sunroof further down more level with the roof.
Small jobs and OMEX management
27th August 2005 • 03:56PM
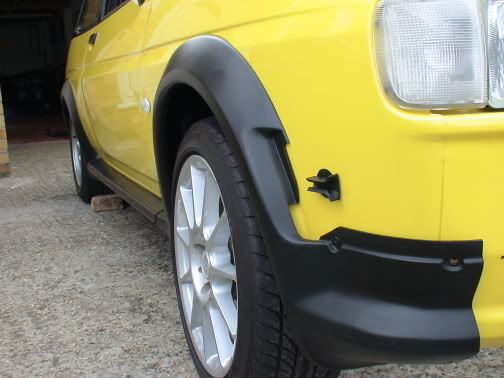
Well it's been a while since i've posted a update about this car, reason being is I haven't had as much time to spend on it due to most weekend's having a show to attend. But I have been doing some small jobs when I manage to get a couple of hrs free in the eve etc. At the moment im running the main battery cable's thru the inside of the car to the engine bay. Hopefully this will be done over the bank holiday. I've also started to fit the rest of the bodykit onto the car. Im using a combination of original Ford fitting's and sikaflex. The side skirt is held on by original fixing's/pop rivet's. I've used the sikaflex on the arche's as I did'nt want to drill hole's in my new panel's for the Ford fixings. Has taken a few day's just to do the one side making sure it all sit's nicely against the body and letting the sikaflex go off. But so far im pleased with the fit and appearance.
I've also just last week picked up my management system for the engine.
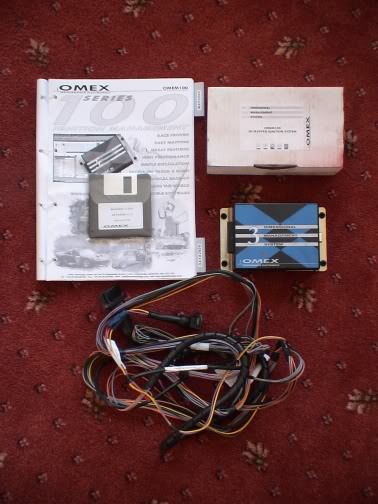
I got this of a mate as he no longer needed it due to upgrading the planned spec of his engine, (cheer's Kev). Omex 100 3D mapped ignition system, with loom etc. I will be fitting the main unit inside the glove box so it's out of the way, and easy for the person mapping it as they can sit inside the car in comfort with there laptop. Again this should be fitted, and loom run thru the bulkhead this weekend.
Magnex exhaust and burton quick shift kit
22nd September 2005 • 04:03PM
Thought it was best that I update the latest progress on the car. The kit is all on except the front valance as this is being left of till after the engine is in. This will be going in after the 10th of october as i've booked a week of work to get the bottom end in with the gearbox. The head will be fiited at a later date. Job's that i've done since the last update are as follow's;
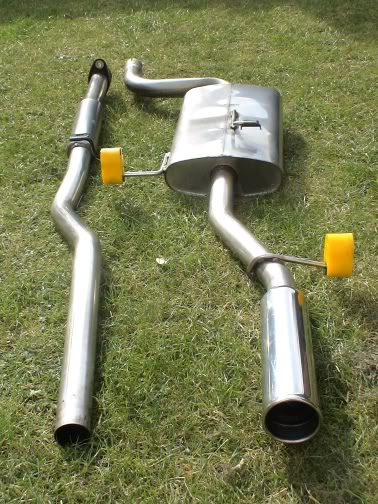
I've had the magnex exhaust out and given it a polish up with autosolve to get back some of it's shine being stainless as I bought it 2nd hand off Ebay a lond whille ago. I had to make up a bracket which come's with the exhaust from Magnex when you buy the system new from them. As mine was 2nd hand this was missing. Luckly I removed the one from my blue XR2 and made a copy. The rear section is now on the car with the yellow deflex exhaust hangers.
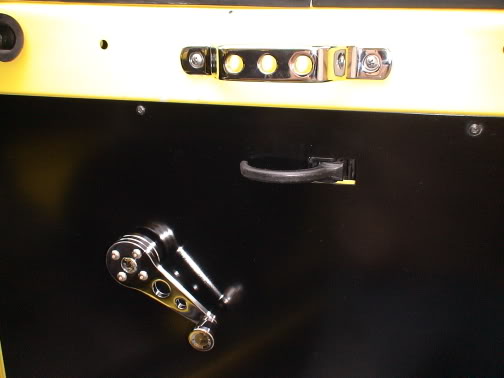
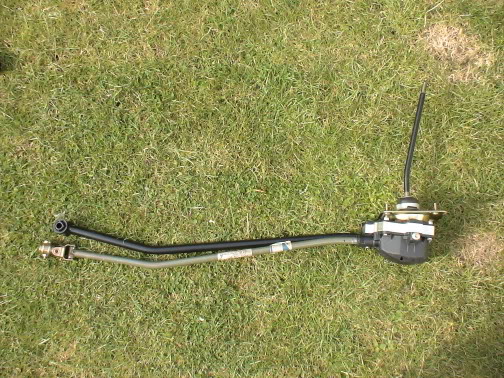
I've also fitted my Burton's quick shift. This was on my imperial blue XR2 I had awhile back which I removed before selling it. As can be seen in the picture it still has it's original Ford labels on one of the shaft's, and also on the bottom black casing. So was'nt very old when I got it, and so should be nice and tight when used on my car.
Also the omex kit is all fitted with the main unit in the glove box with the main loom running thru the bulkhead with the main battery cable. The battery cable's have been neatly secured to the car with alloy p-clips and cable ties. The only other small job was re-fitting the front wheel arch liner's back in place. Once I get chance to get the car back out of the garage I will get some more picture's of the outside of the car with the kit on.
Blowing off the dust
24th September 2005 • 04:08PM
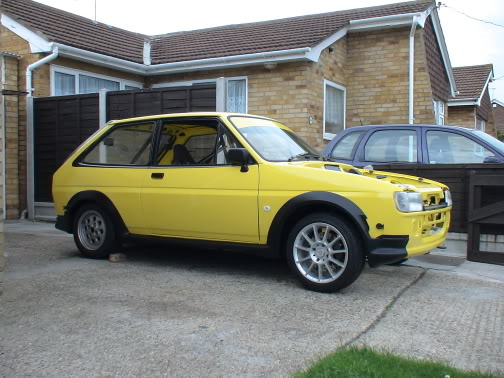
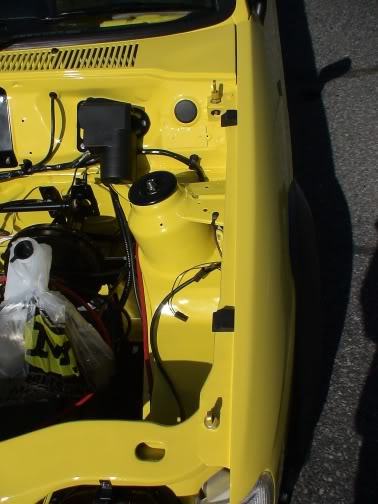
Well today got the car out the garage to put it back in facing the other way round for when I put the engine in in a couple of week's time. So I thought it would be a good day as it's sunny to blow the dust off and get a few picture's. Front end shot with the missing front valance and the engine bay all ready for the engine. Will give it one more coat of polish soon before the engine goes in.

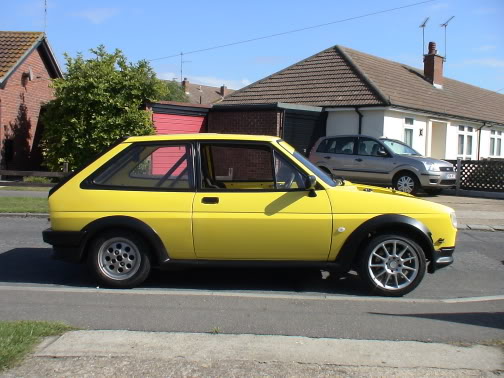
Passenger side - Noticed while it was out that I have'nt sprayed the fuel filler cap to match the kit. So it look's like I will be popping into Halford's for another tin of bumper spray. Also once the engine's in the front end wont look like it's in stilts.
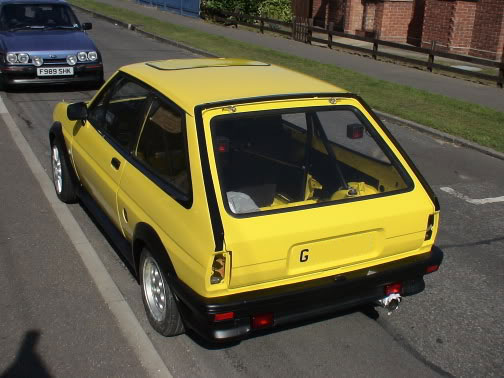
Rear end/roof shot - Rear bumper is the same colour as the kit, infact all the outside plastic has been sprayed in the same paint. The rear section of the Magnex exhaust is on, but as it's not connected to anything the box is sitting at the wrong angle. Hence the rag between the tailpipe and the kit to stop any mark's. Also if you look thru the rear screen you will see a pair of rear brake light's that I have fitted to the position's were the top of the tailgate strut used to fix on. The light's were part of a genuine Ford universal brake light kit that I had, and modified to fit the car. Hopefully the extra light's will stop anyone running into the back of me. Im also on the look out for some smoked rear light's, but nothing to dark.
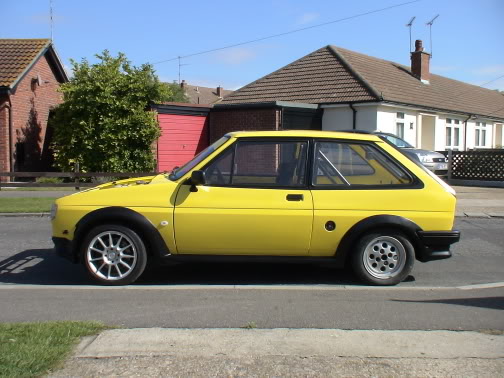
Drivers side - Much the same as the passenger side shot. The 15" wheel's on the front I will be getting re-furbed, and coated in a satin black finish to match the kit. I dont think silver wheel's suit the colour combination of the car now.
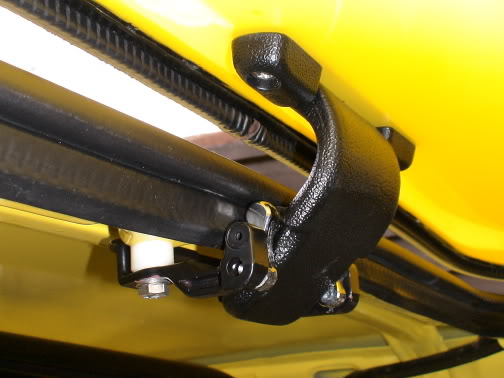
Shot of were I have fitted my bonnet pins. I have used the exsisting hole were the rear rubber adjuster/buffer used to be, and drilled a extra hole in the area of the wing/front panel overlap area.
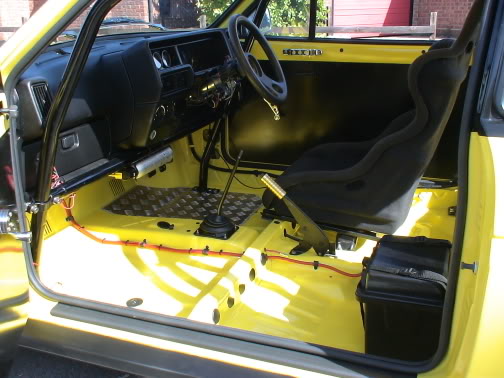
And finally a shot of the inside of the car to show the battery cable's (one still to be extended), battery box, gearlever and handbrake that have all been installed over the last couple of week's.
Looking forward to getting the engine in, I will be leaving the head of for now as im still unsure if I will be getting anyother work done to it. Just got to make sure I take care lifting it in as I dont want to knock or scratch the paint in the engine bay.
Zetec Bottom end fitted
22nd October 2005 • 04:24PM
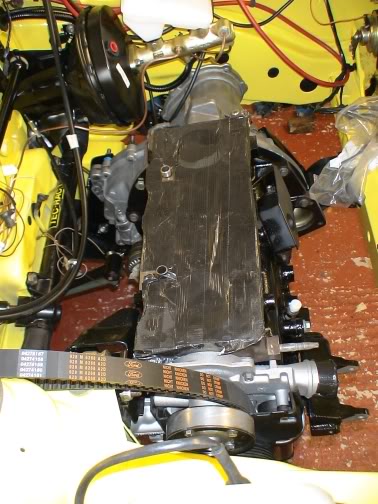
The engine is now in the bay minus the head as this is currently being worked on by Scholar engine's.
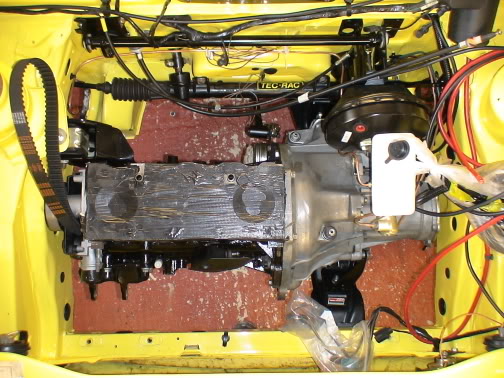
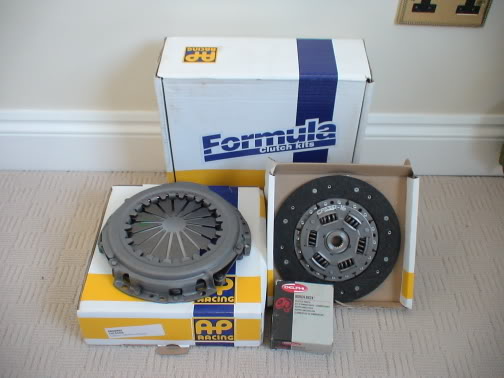
I've used a new AP racing S2 Escort turbo clutch kit, but as this is rated for standard turbo's or one's with minor mod's im a bit worried that this might not be upto the spec of my engine. It was either take a chance and fit it, or buy a uprated kit which would of cost me another £255. If I do have problem's with it I will have to change it at a later date.
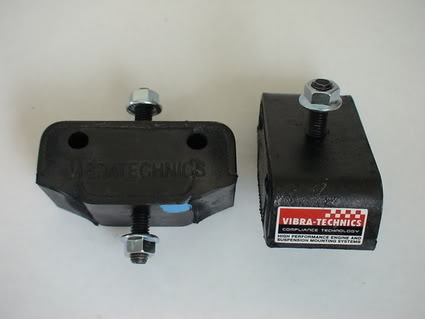
The engine is supported with Vibra-technics HD road mount's. The top mount is a modified cvh item with a new Ford mount fitted.
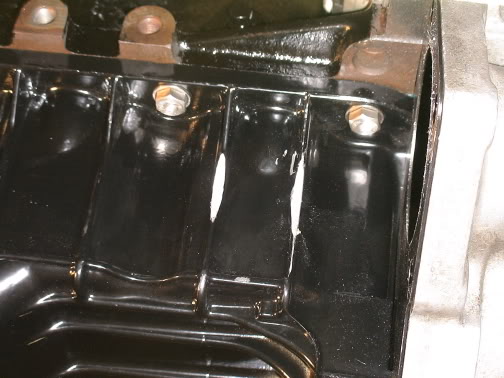
I found that the new genuine Ford starter that I fitted slightly hit on the fin's of the 1.8 zetec sump. I had to grind down these fin's so that the starter would bolt up correctly.
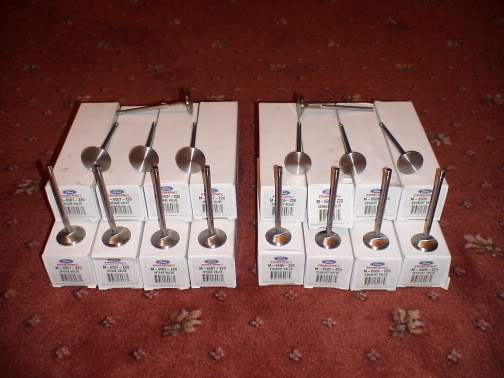
I have now found out that starter's do come up in slightly different size's. So if you have this problem it may be worth trying another starter. I mentioned above that i'm having the head fully worked to improve the flow, and the inlet manifold matched to the head. I am also getting a set of 1mm oversize Ford racing stainless valve's fitted in the head with a set of uprated Kent valve spring's which should work nicely with the Kent FV2002 cam's i've got for the head. Hopefully I should get the finished head back in a week's time.
The only other job's i've done is to fit the padding to the rollcage, i've still got the door bar's to do.
Today I had to remove the rear Lead shock's because im not 100% happy with them. What happen's is that when you jack the car up and lower it onto the axle stand's point's, the axle drop's and the spring's become loose. If it was'nt for the bump stops you could take the spring's out. Well this is a mot failure, so im taking them back and having the shaft's shortened by 1" so then the spring's will stay tight. I wish they had told me about this when I ordered them. I will see what they say next week when I take them in.
Add a Comment
Page Last Updated: Monday 18th of June 2018

