›
› Yellow Track Mk2 Fiesta XR2 Project
Yellow Track Mk2 Fiesta XR2 Project

Author: Robert Saunders | Photographer: Robert Saunders
Clutch Details
22nd October 2005 • 04:27PM
The AP kit that I fitted is the CP2000-15, and the information below is taken from the AP site.
Year 3/86 - 7/90. Clutch Kit for FORD ESCORT MK3/4 RS TURBO Part No. CP2000-15 This clutch kit is suitable for standard engines or those with minimal modifications and is supplied with cover assembly, uprated organic driven plate & release bearing.
Diameter (mm) 220
Torque Capacity Nm (lbft) 192 (142)
The clutch kit I think I should of got was the CP2000-8 which is rated @ 230(169) Nm(Lb/ft). The torque figure for my spec engine is'nt going to be massive, and im not planning on doing 0-60 sprint's as it being built as a track car, so im hope'ing that this clutch will be fine.
Elliot rev counter and other odd jobs
20th November 2005 • 04:32PM
Blimey were did that last month go to. Can't believe it was oct 23rd the last time I posted something up about my project. I've got round to doing some job's on it, but im gradually running out of job's to do now. I've been waiting for my cylinder head to be finished. Im now getting it back next tuesday, so then engine build can re-commence. While I've been waiting i've had to modify the glove box lid again as I fitted the rollcage padding it was hitting on it. So I had to cut of about another 10mm to clear it.
I finally got a elliot rev counter of Ebay.
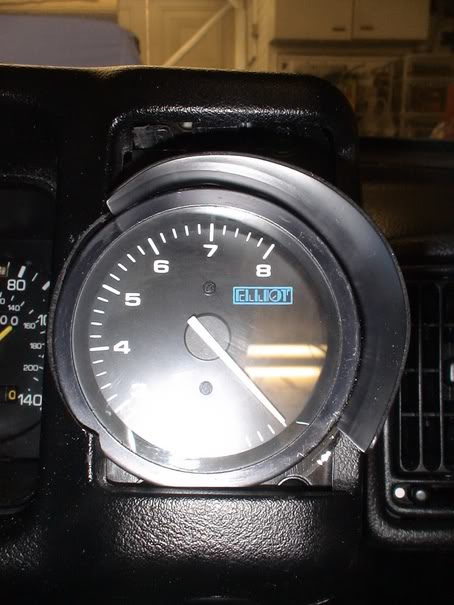
I've modified the switch holder again that used to hold the 3 rocker switches. I only had the fog light switch in it before, but now this has been changed for a MK3 Escort switch and been fitted were the speaker joystick used to be. I found the light's in my garage were reflecting quite bad on the glass, so I made up a thin alloy curved plate that fit's round the gauge and seem's to keep the light of the face now, ( the bright area in the picture is from the flash on my camera). I've cleaned out as best as I could the RS1600i brake fluid canister, and fitted it on the master cylinder. It was then filled with fluid and bled. I had two small leaks, one at the master cylinder and the other at the join to the braided hose at the rear p/s drum. Tightened up the joint's, and they have sealed up nicely. The brake's have now been fully bled and feel's about right. But I wont be able to tell until the car's running and on the road. Today I removed the Leda stock hatch front shock's, and replaced them with the Leda coilover item's i've been given to try out (cheer's Kev). They came fitted with 350Ib spring's, and they look so much smaller compared with the standard XR2 setup when viewed in the arch. I've set the spring's at there highest setting, so when I drop it back on the floor I can see the max wheel arch gap I will have, and then wind them up to see how low I can go. Picture's to follow hopefully tomorrow. I will get some picture's up of the head once i've got it back.
More Lightweight parts
21st November 2005 • 04:38PM
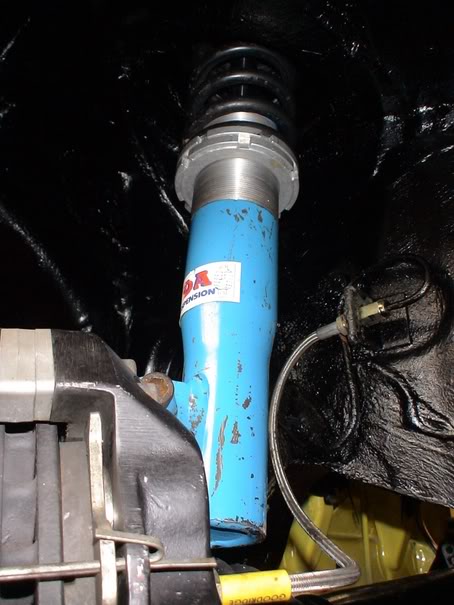
A small update following on from yesterday. I popped out to the garage to get a few more picture's. Bit dark in the front arche's, so I was having trouble getting a good shot of the leda coilover's.
This is the best I could get for now. Must remember to coat the thread's in copper grease once i've set them in position.
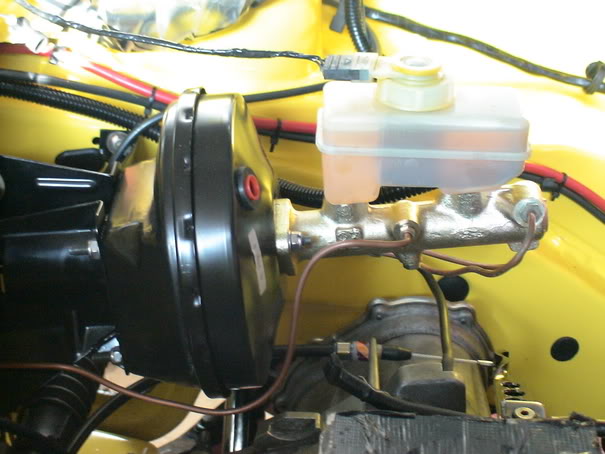
A picture of the RS1600i brake fluid bottle. As you can see I could'nt get the container fully clean, I tried everything I could think of but you just can't get anything into some area's to give it a rub. But as you can see the fluid in the bottle sit's allot better than the mk4 Escort item. The car is still up on axle stand's, so hopefully when it's back on the floor the fluid will sit even more level.
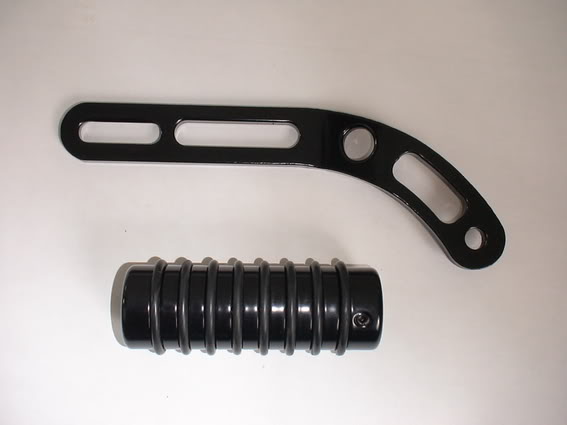
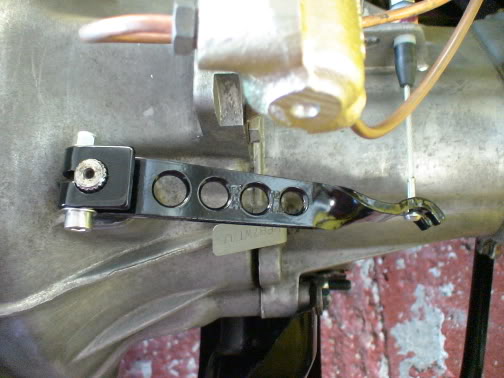
And finally three item's that I had powder coated satin black. The alloy handbrake handle which i've fitted o-rings in the groove's to provide a bit more grip. And a cvh alternator and clutch lever bracket's that i've lightened.
Stage 2 cylinder head
22nd November 2005 • 04:42PM
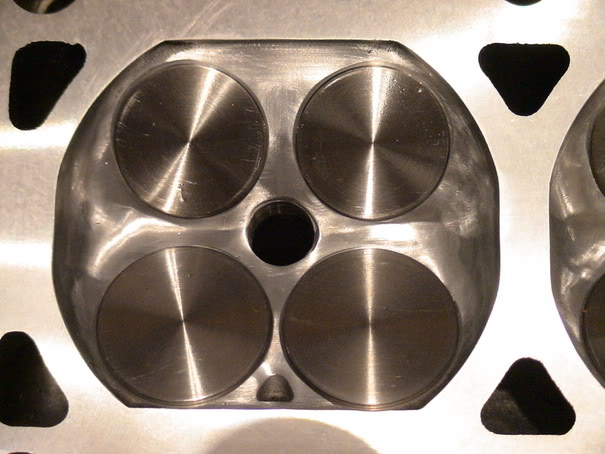
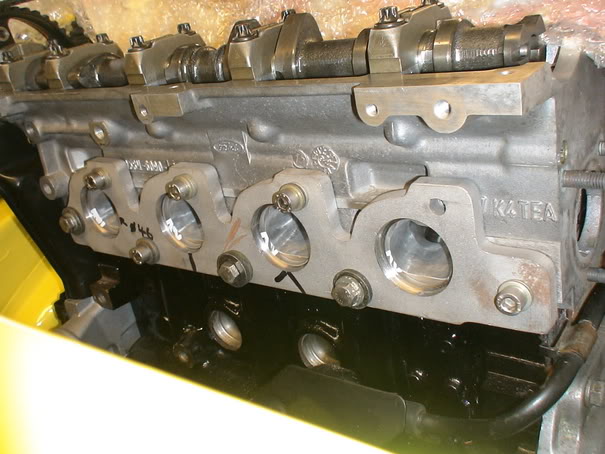
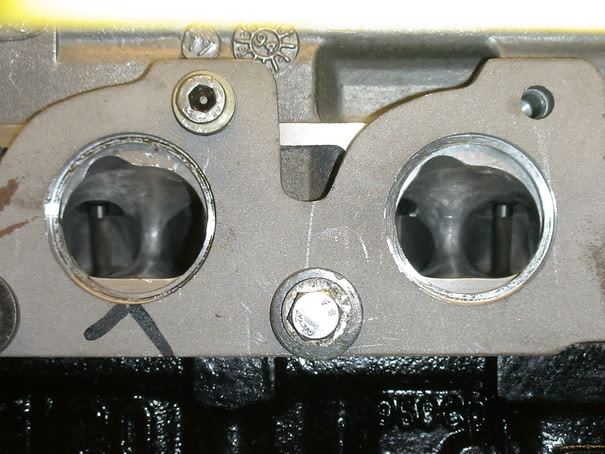
I finally got my cylinder head back today, and it look's nice and shiny. My 1mm oversize stainless valve's are in with a set of Kent VS46 valve spring's, and the head has been classed as a stage 2.
Underside view

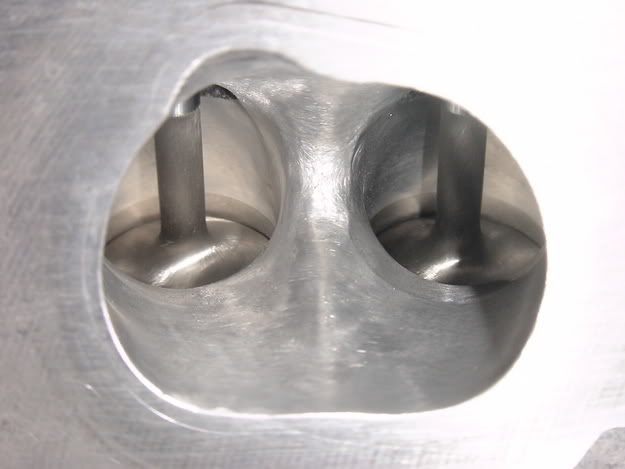
Inlet side
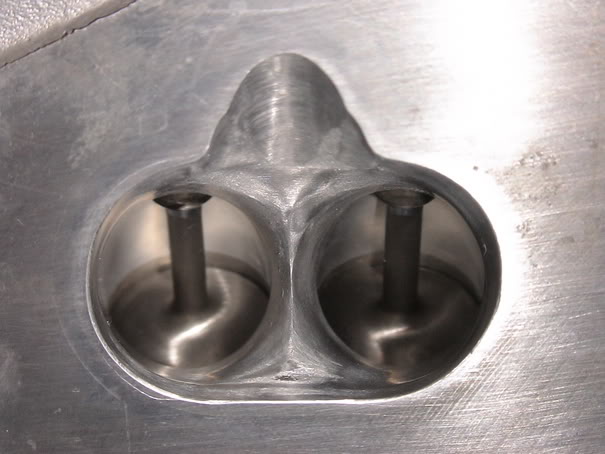
Exhaust side
Inlet manifold
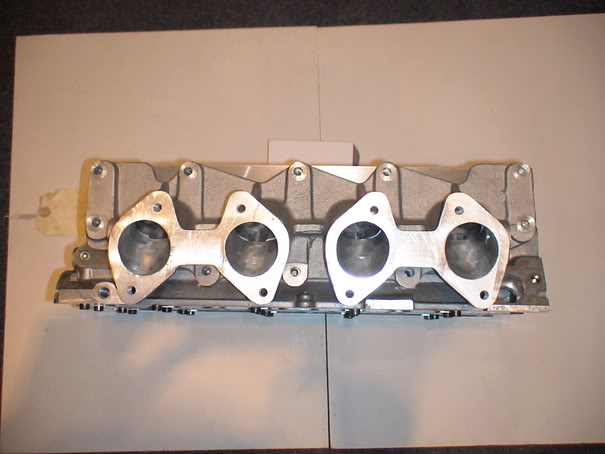
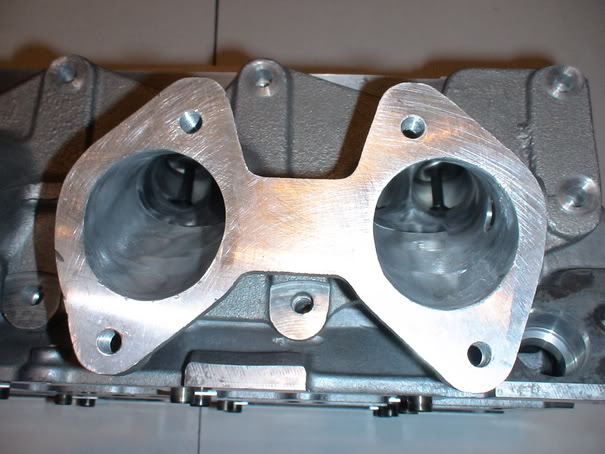
I had already opened up the port's in the manifold to the Ford gasket and polished it. But they wanted it to match the head. But looking at it I dont think they did allot more to it. They told me not to use a gasket, and just use a good quality gasket compound between the head and manifold.
Now i've got the head back I can crack on with building it up and bolting it to the block and fitting all the other part's.
Update's to follow.
Head fitted
3rd December 2005 • 05:25PM
It's slowly but surely getting there. Just a small update to follow up getting the head back, and few other item's.
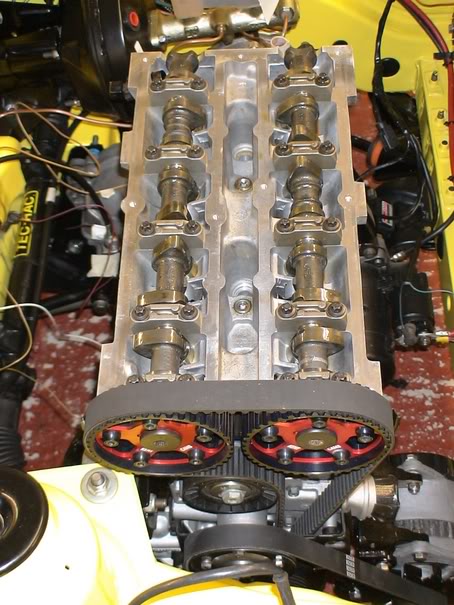
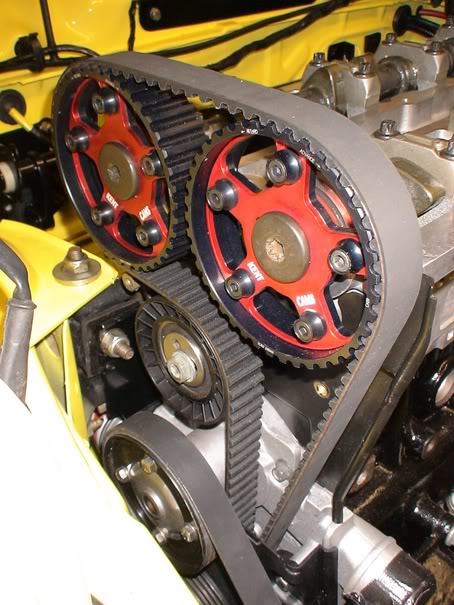
The head is now fully bolted down with the Kent (FZ2002) cam's, and the Kent adjustable cam sprocket's fitted. The timming has been set to factory setting's with a new Genuine Ford cam belt.
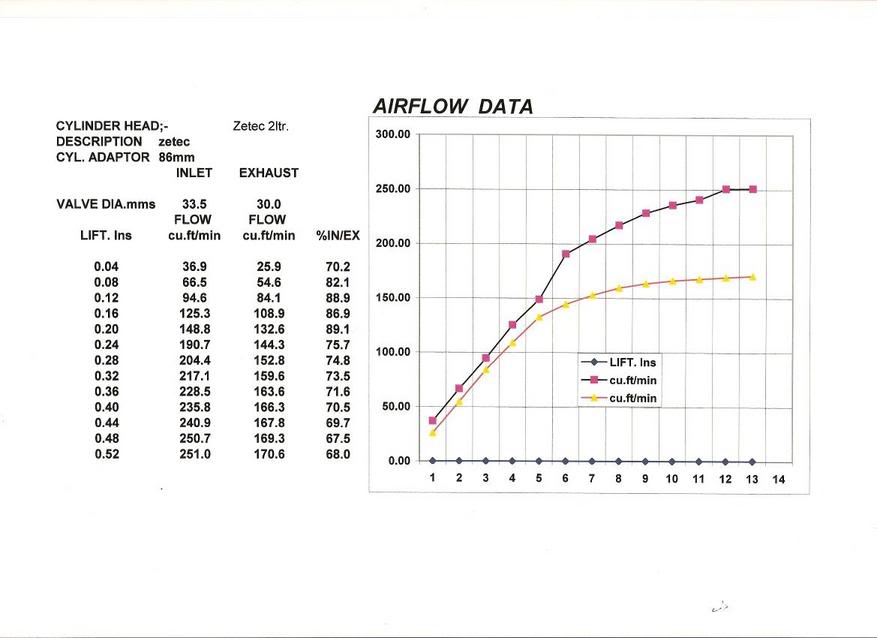
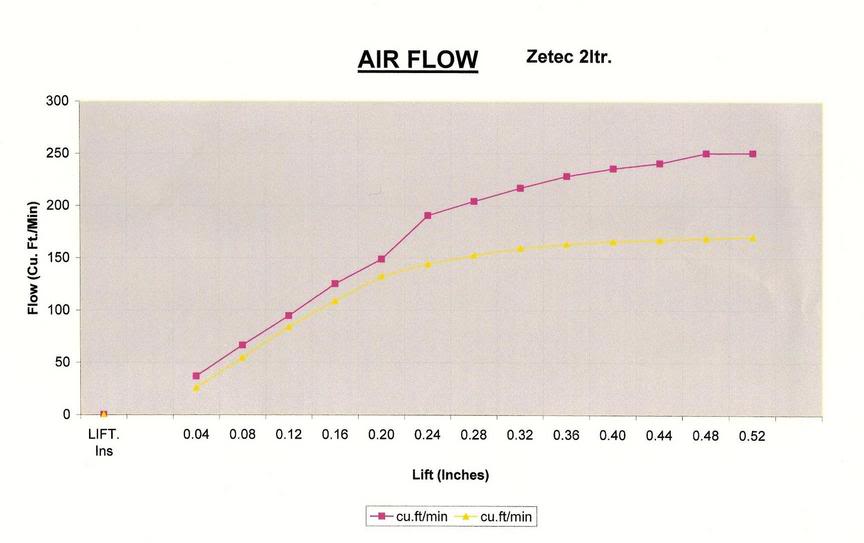
I got Scholar engines to email me a couple of graph's to show the airflow data for there spec zetec head's. Bearing in mind i've gone up 1mm on the valve size's (inlet 33mm, exhaust 29.8mm), not what's shown on the graph's.
The next job is to drill the hole in the side of the inlet manifold for the vacuum pipe from the servo. I will do this at work this week, as the taps I needed came today (14mm x 1.5 pitch).
Well i've been in contact via email with Pace product's about the alloy rad that I want made. They have advised me not to do away with the header tank if im building the car as a track car. So today I fitted one of my brand new genuine Ford header tank's, which I payed £3.49 each for about 10yrs.
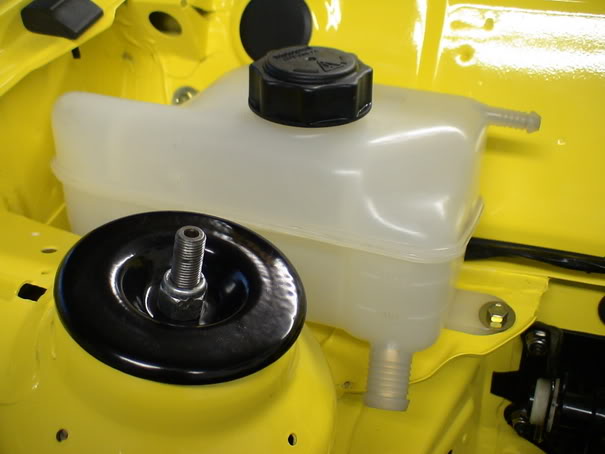
This will stay fitted to the car for now, but depend's how much a alloy header tank will cost me.
I'm looking at getting a standard 500mm (tube length) x 300mm (stack height) rad made but with a thicker core width. The bottom inlet will be made to match the size of the outlet on the zetec water pump. I will be looking at some custome hoses being made for this setup.
Im taking a old rad, measurement's and picture's etc up to Pace on monday to have a chat, and hopefully get them to make it up. I will report back on what I found out next week.
Oil cooler, radiator and exhaust manifold
9th December 2005 • 06:09PM
I've been busy the last few day's as i've been trying to get 3 jobs progressed on the car at the same time. These are the oil cooler, rad and exhaust manifold.
Oil cooler
I bought a alloy 10 row oil cooler with 1/2" BSP push on connector's, which I've fitted on it's end next to the radiator on the passenger side.
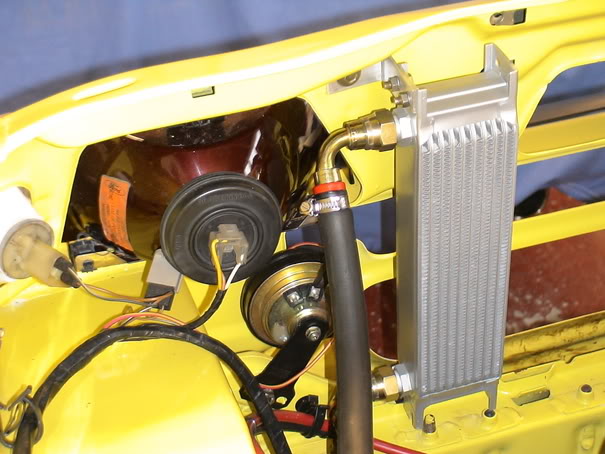
In this position it will get maximum airflow thru the front panel.
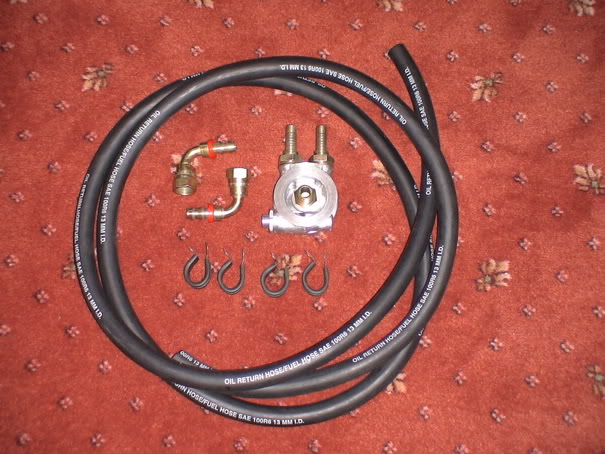
I also purchased from Burton's the following item's to connect the cooler up to the engine.
- Mocal thermoblock, 1/2" push on connector's
- Pair of 1/2" BSP, 90 deg oil fitting connector's
- 1/2" HP oil hose
- Stainless rubber lined p-clip's.
And a picture of the thermoblock fitted to the oil pump with a cvh oil filter fitted.
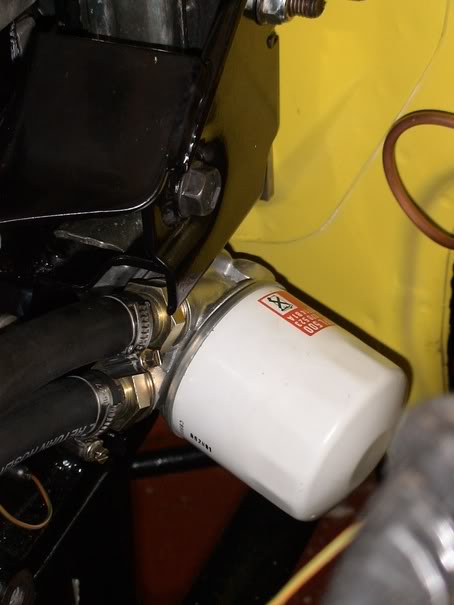
I had to cut out a section of the modified top engine mount bracket to give the pipe's a bit more clearance, as it was very tight fit running the pipes past it.
Coolant radiator
Now following on from my previous post about getting a rad made I went to Pace product's and had a chat about what I needed. But I wasn't very impressed with the service I got. I wasn't shown any example's of there rads, and the person I spoke to couldn't quite get what I wanted. So I came away very unimpressed.
Luckly I had a email back from Pro alloy motorsport ltd yesterday. I phoned and had a chat with Wayne who was very chatty and most helpful. Offered to show me round, and even offered to have the kettle on for me when I got there
So I popped up to see him after work today. And what a helpful fella. I took with me my modified standard rad so he could clearly see what I wanted made. He liked that, and came up with some other ideas for it. He showed me a rad they had made for a cossie and it was made to a stunning finish. So I have asked him to make me my rad, which will probably be ready for me just after xmas. The rad is based round a 43mm width core (standard XR rad is 30mm), and will be fitted with a 11" spal sucker fan.
One thing I did ask him about which may interest a few people is a alloy header tank for the MK2 XR2. He hasn't actually made one yet (though others have shown interest in getting one made), but asked me to bring with me a standard Ford header tank for him to look at.
He is keen to make the pattern's up for it, and has asked me to send him some pictures of the tank fitted in the engine bay. He also wants to get a look under the bonnet of a XR2 which I can't do as mine are both of the road for the winter.
Now the estimated price for the alloy tank is £140 to £150, or if you wanted one with the glass viewing port this is another £30. At the moment this is just a guide price, it may reduce slightly depending on how much work is needed to make the tank's up, and demand. I did say to him that I would put the word around that he is considering making them up. So if anyone is interested, perhaps you could have a look on their web site and send him a email. The more interest, the more keen they will be to make them up.
He did also say he would be happy to offer a discount for a group buy, but after most other group buy's not working out, it's not something I would be to interested in taking on.
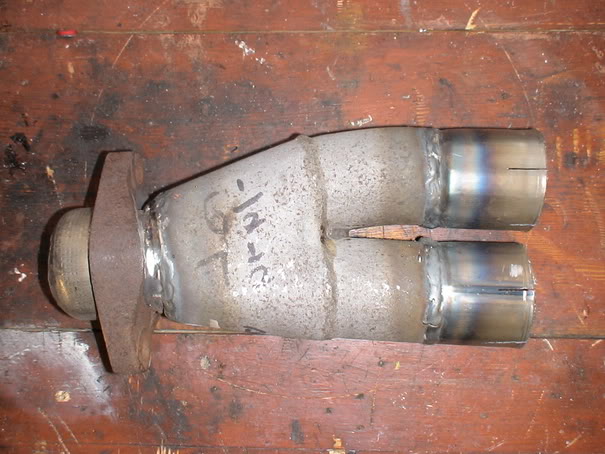
Exhaust manifold
Now the system im using is a magnex, but I didn't have a manifold. I've now been sold a mild steel large bore Janspeed manifold from a Escort RS1600i for a great price. This will need modifying to match the magnex. This consisted of shortening the Y-section on the end, and changing the flange to suit the magnex. I had given this to Pipecraft in Basildon, Essex to do for me. This is the finished y-piece when I got it back.
And I was very pleased to find when I offered it up it went exactly how I wanted it. In the picture it is loosly trial fitted in place.
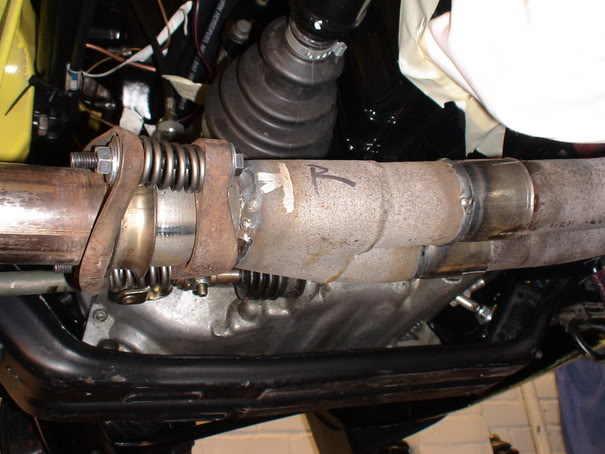
Now need to cut off the main flange to the cylinder head, and weld in position my cvh/zetec combo flange that I made up a few month's ago. This will then bolt up the the zetec head, and match the port's correctly. This way it save's me having to get a complete manifold made up which would be rather costly.
Exhaust Manifold
15th December 2005 • 06:38PM
I've now finished adapting the Escort RS1600i Janspeed to the zetec. The zetec/cvh flange went on with no problem's, and was bolted in place.
Then the exhaust manifold had it's original flange cut off. It was then carefully offered up to the flange on the engine, but the down pipe's were found to hit on the front left corner of the cutout in the sump. The only way round this problem was to flatten one of the down pipe's to make clearance so it then lined up with the exhaust. This was done and the manifold lined up with the system, and the down pipe's slotted into the flange on the head. I then tacked the four pipes to the flange, and removed it from the car to fully welded it up.
It's now back bolted onto the car and look's fine (picture to follow), but im not happy about the clearance with the sump. So today I popped back to Pipecraft, and they said they will re-make the bottom two pipes for me to clear the sump correctly. This I will get done in the new year.
Fuel cut off and manifold continued
16th December 2005 • 01:46PM
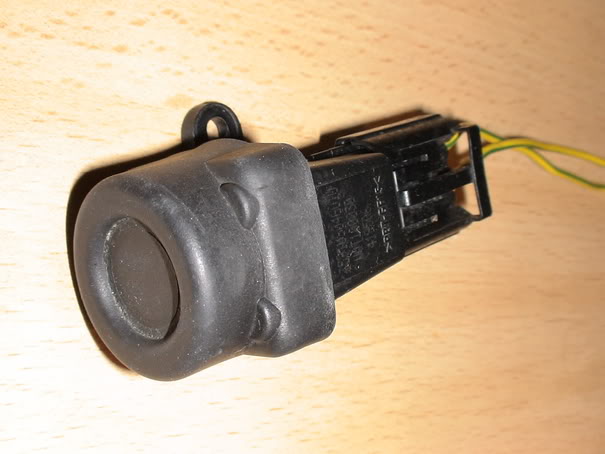
I got this the other day off Ebay. It's one of those engine cutoff switch's. It works that after having a hard bump or if you rolled your car the switch deactivate's, and in my case will cut the live feed to the fuel pump.
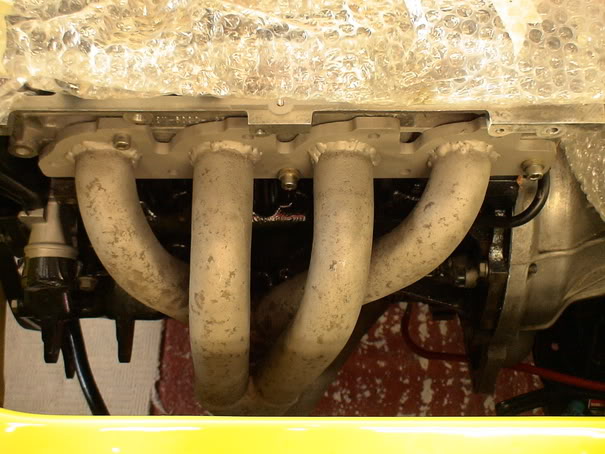
Also got a picture of the manifold bolted to the head. Once the down pipe's are corrected it will be sprayed in heat proof paint, and then covered up in exhaust wrap.
This weekend im going to get the rose jointed panhard bar bolted on, and hopefully adjusted to the right position.
Add a Comment
Page Last Updated: Monday 18th of June 2018

