

Removing Mk2 Plastic Side Mouldings
Guide Submitted by Jon (2003)
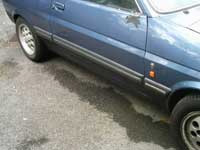
Some "High Series" Fiesta models feature large side mouldings to protect the doors and perhaps make them look better.
Typical examples are the Ghia and Sport models. When I used to own a 1.4 Sport I actually colour coded these mouldings (along with the bumpers) in Sunburst Red. This contrasted really nicely with the black car.
I also had a colour coded boot spoiler, wipers, spot lights and interior knobs.
The problem with all this is that the paint will invariably crack off in certain areas. If you do paint these side strips, remember that the thick coloured insert (usually a red or chrome plastic stripe) rubs against the plastic and eventually wears off paint around itself.
The best thing to do is to remove these plastic things following my handy guide. It also gives the car a much sleeker appearance.
Step 1: Remove the Plastic Strip.
You can prise out the plastic stripe using a thin flatbladed screwdriver. The stripe is stuck in with very thick adhesive so it'll be a bit of a struggle.
Step 2: Drill out or snap off the Securing Rivet Heads
The plastic mouldings are attached via standard Ford waterproof rivets. These consist of a standard rivet head faced against a rubber washer.
Be careful when removing these rivets. I simply snapped off the heads with a girt fu*k off pair of pliars but you may regret doing the same. If you put too much pulling pressure on these rivets they will stretch the metal bodyskin underneath. You DON'T WANT THIS!
If the skin stretches and forms little mounds you'll have to gently persuade it smooth again with a hammer, like flattening a mole hill. NOTE: Early Ghia models have overriding pieces that follow the wheel arches down to the ground. These are attached via two extra rivets to the arch lips which will need to be drilled out also.
Step 3: TEAR IT OFF!
Try and tear it off gently so as not to damage the paintwork underneath with the adhesive. This is all attached to the car via standard Ford sticky rubber which is a bitch to get off.
Step 4: Have a cup of tea/coffee.
I say have a hot drink because you can warm the hot water over the 'fire of ritual sacrifice' that you have just built from some old Fiesta side mouldings. You know the fire we always use to destroy old shit. PS: Stand well back, plastic fumes are toxic and if inhaled you'll be firing blanks for the rest of your life!
Step 5: Clean and prepare the area.
Using a Hair Dryer or other heat source remove the left over rubber adhesive and thoroughly clean the surface with some spirits/meths/lighter fluid etc.
Lightly sand the area(enough to remove the glossy surface) and wash it. Now remove the interior door trim.
With the interior trim removed you can stick a piece of mesh or cardboard(!) over the back of the rivet holes with bodyfiller. This will give you something to fill against so the filler doesn't just fill up your doors. For the front wing and back bits I just stretched filler across the holes as I couldn't find anyway to get at them, although this is more fiddly.
Step 6: Painting.
Normal rules apply here. Prime the area fully. You normally use more primer than paint!
Once the primer has dried and you've put on a few coats (yeah, like you can be arsed to wait 24 hours!) apply the top colour coat.
Don't worry about overspray we'll get to that later. Don't mask too close to the area you want to paint either. If you mask too close you'll end up with a recessed line where the tape is and it's a bitch to level it all out.
Step 7: Sorting out the overspray (told you so)
Buy some rubbing/cutting compound or maybe even just use T-Cut (if you're broke and your Dad's got some you can nick). Now you need to rub this like hell all over where your new paint meets your old paint. This will remove bad overspray and should blend the two surfaces nicely together.
Don't do this cutting/rubbing business until a lot later (a few days oughta do it) otherwise you'll rub the new paint thin and it'll look shit.
Now wax the car all over to protect it and keep it shiney!