›
› Yellow Track Mk2 Fiesta XR2 Project
Yellow Track Mk2 Fiesta XR2 Project

Author: Robert Saunders | Photographer: Robert Saunders
Lightened brackets
17th December 2005
The car is now back down on it wheel's for the first time since fitting the Leda coilover's on the front. But I found that the side of the tyre's were rubbing on the body of the coilovers. So I've had to fit 3mm spacer's to the front to bring the wheel's out. I did'nt need to do this with the normal Leda's, so I can only think the body of the coilover's is slightly larger diameter
I also fitted my lightened coil pack bracket back on the engine. I thought the original Ford designed bracket was way over engineered for the job it's required to do. So I removed a fair amount of metal from it. Anyone with a zetec mk2 will see how much different the bracket is.
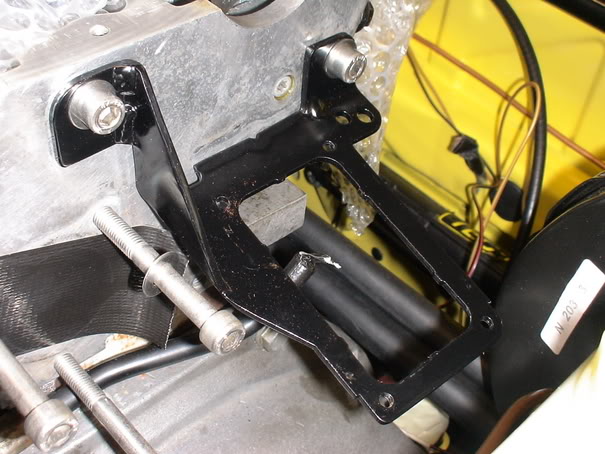
This was then powder coated, and finished off with stainless bolt's.
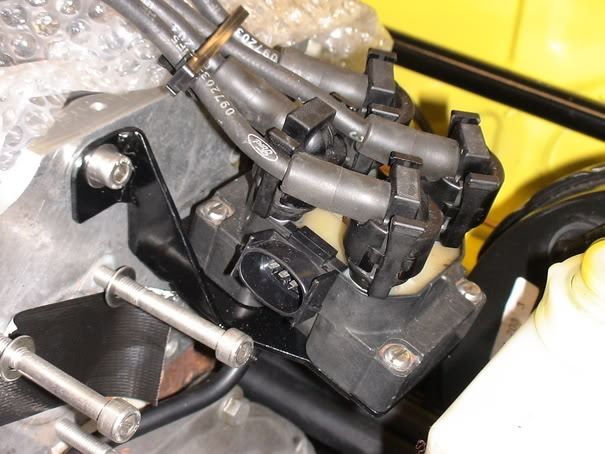
I've got it down to about half the weight of the original bracket, every little bit help's.
Gear linkage improvement and inlet fitting
1st January 2006
Here's my xmas update. Haven't got as much done as I would of liked due to being ill over christmas (still am), and some days it being to cold even in the garage. But here's what I did get round to starting.
I removed the gear linkage off the car again as I wanted to fit a set of phosphorus bronze bushe's, and a poly bush that i've made up. This was to tighten up both the stabilizer bar, and the gearbox linkage.
The picture below show's from the top a new stainless steel bolt, poly bush and stainless steel tube for the stabilizer bar. And at the bottom one of the replacement bush components (there are two of these) for the gearbox linkage.
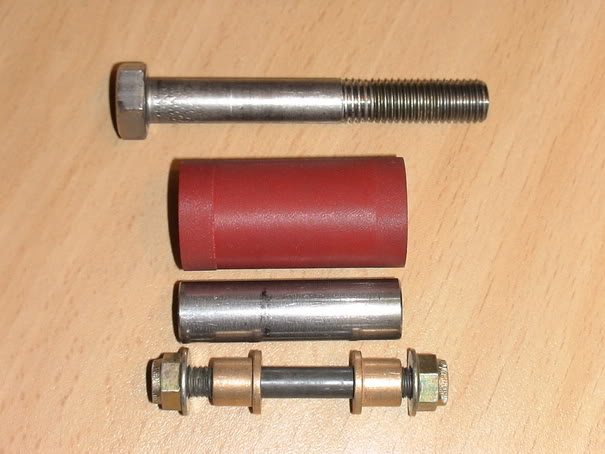
The idea with these part's is to remove all the play in the end of the bar's. The stabilizer bar has been blasted ready to be powder coated satin black. But the bronze bushe's have been fitted. All that is required is to drill out / remove the original rivet's, and remove the nylon bushes. Then reassemble with the new component's.
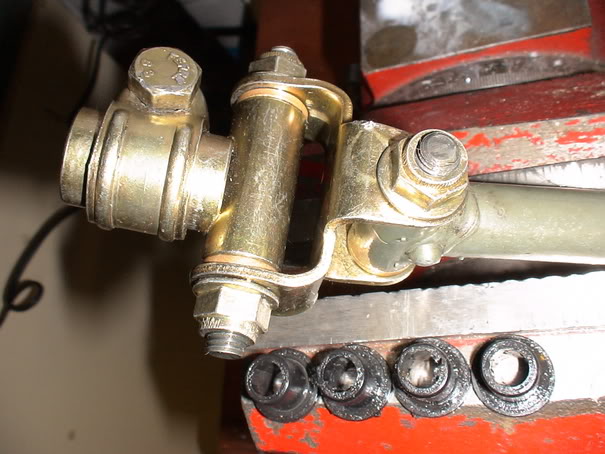
End product (shown above) was coating in fresh oil,and feel's much more firmer. Once the stabilizer bar is powder coated, and refitted I will report back on how the linkage feels back on the car.
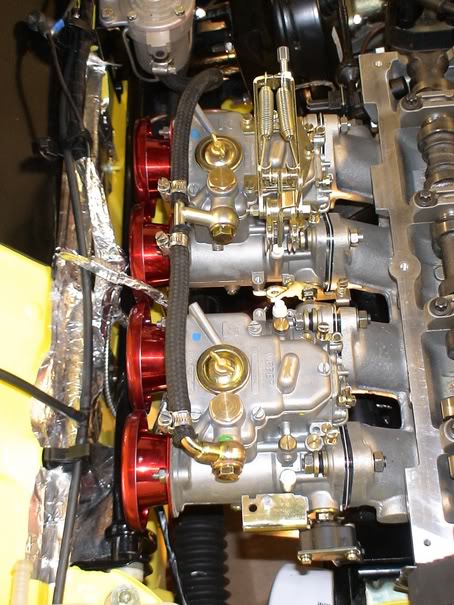
I thought for the next job I would start to assemble onto the engine the Weber DCOE's and related part's. Scholar engine's had told me to not use a gasket, and bolt the manifold onto the head with a gasket sealing compound. I did'nt like the sound of this, and the genuine Ford inlet manifold gasket is made up of two thin gasket's stuck either side of a thick plastic spacer.So I thought I would make up a thin paper gasket to go in between the two item's. Only trouble was finding someone who sold gasket paper?
I then found that my local motorfactor's did a gasket for what I needed, so this was purchased and when offered up the the manifold mached it pefectly.
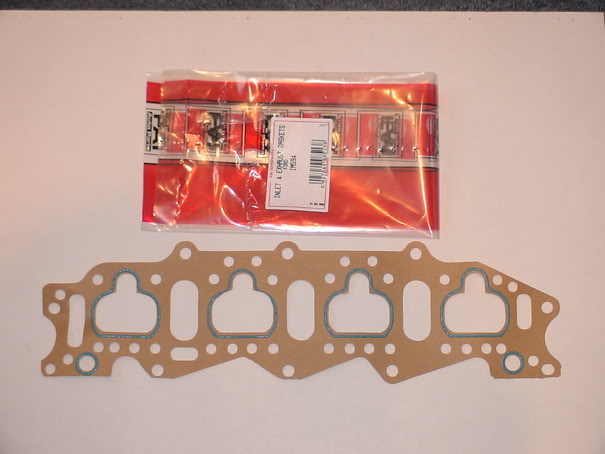
So the manifold was bolted on with new stainless steel bolt's.
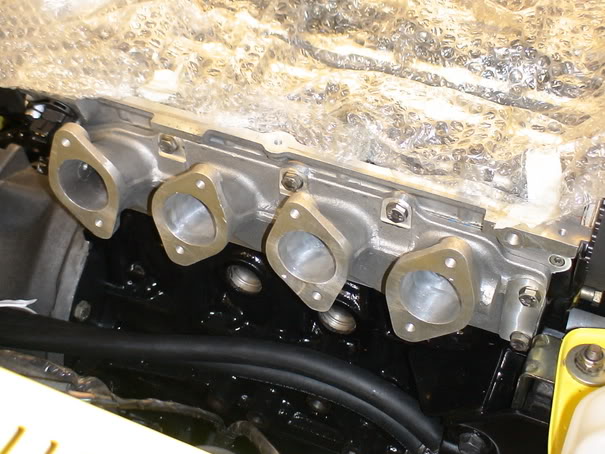
Now before fitting the manifold I had machined out the sections of alloy that joined the four inlet port's together. I had to for one position for the linkage, so whille I was at it I removed all three section's. That's a bit more weight reduction.
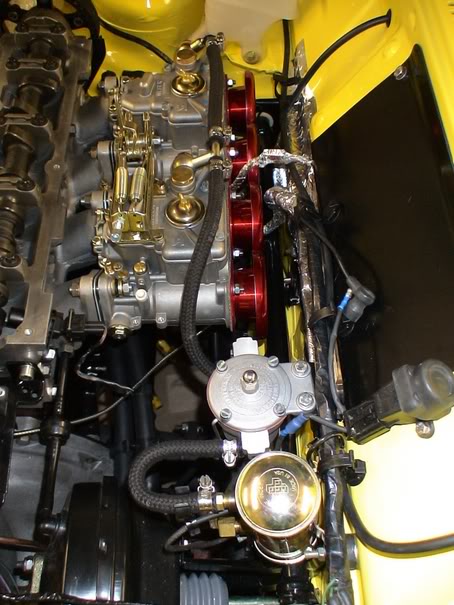
I then had a look around the engine bay to find the best position for the fuel pump and the regulator. The best area I could see was a section of the bulk head between the servo and the carb's. The pump is close to the fuel pipe from under the car,and also right next to the carb's to keep all the fuel pipe's short.
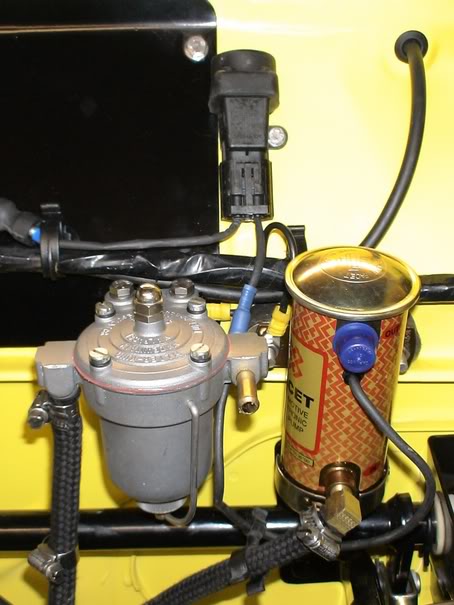
I also managed to use some existing hole's to mount the pump and regulator. I also fitted the fuel pump cut off switch to the bulkhead just above the pump and regulator. I need to get a straight fuel connector for the outlet from the fuel pump to the regulator to finish it off.
Will hopefully finish fitting the carb's soon, and will update as I soon as possible.
Carb Troubles
4th January 2006
The progress of assembling the carb's to the engine has come to a halt. I found that the Pipercross PX600 air filter I wanted to fit will go between the carb's and the bulkhead, but the brake transfer bar sits higher than I thought and is in the way. So now im looking at ram pipe sock's which Pipercross do for the full radius alloy ram pipe's im using. These will hopefully fit the available space and not touch anything.
So tomorrow after work im going to Burton's with a DCOE, and have a look at the available filter's they have in stock. It also look's like I will have to protect the area of the bulkhead in front of the carb's with some aluminised heat barrier, and also cover the wire'ing loom. I've moved the loom up as much as I can, and fixed it in place with Ford loom clip's. But were it come's thru from inside the car to the engine bay is directly inline of any heat or spit back. So It will pay me to protect this area just to be on the safe side.
Tomorrow im taking in another batch of item's for powder coating, so I will update as soon as i've got more to list.
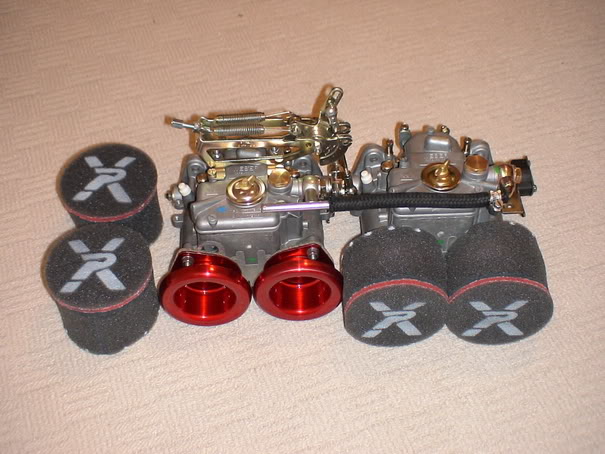
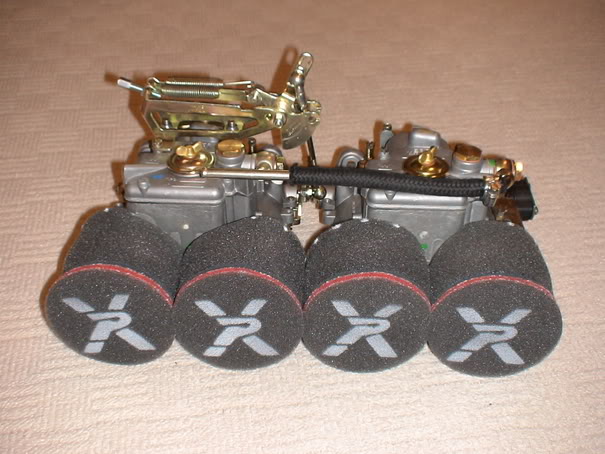
Carb Universal Trumpet Socks
5th January 2006
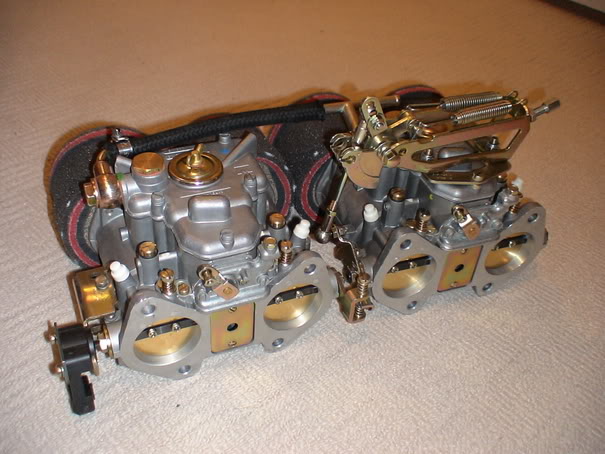
I popped into Burtons today and purchased a set of pipercross universal trumpet sock's (C1050) for my Weber 45 DCOE's. These have been cut down to suit the available space between the carb's and the bulkhead. The top mounted genuine Weber linkage has been fitted, and the link's adjusted. Also the throttle position sensor has been fitted to the end carb on a bracket that I had to modify, as it wasn't the correct bracket for my setup.

Hopefully tomorrow afternoon the fuel side of the engine will be fully finished.
Carb Fitting
15th January 2006
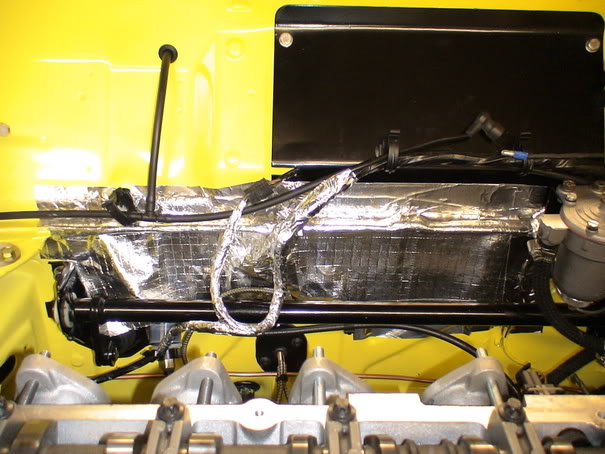
Today I popped out to the garage to continue working on the car to get the Weber DCOE's on. Been a slight delay, as I have been waiting for the aluminised heat barrier to come thru from Ebay.
The main covering for the bulkhead is a woven material with a metalic surface, which has been stuck in place with a aluminised adhesive tape. It was very tricky getting it to fit neatly around the bracket's, and brake bar. The adhesive tape was very thin so crinkled easly, but hopefully it should stop any heat etc from damaging the loom and paint.
Then it was on with the carb's. I have descided to leave the sock airfilter's off to after the car has been setup. Reason is that the tuner's will need to remove the ram pipes to change the choke's, and the sock's are difficult to get on and off. So I thought it best to leave them of incase they got damaged.
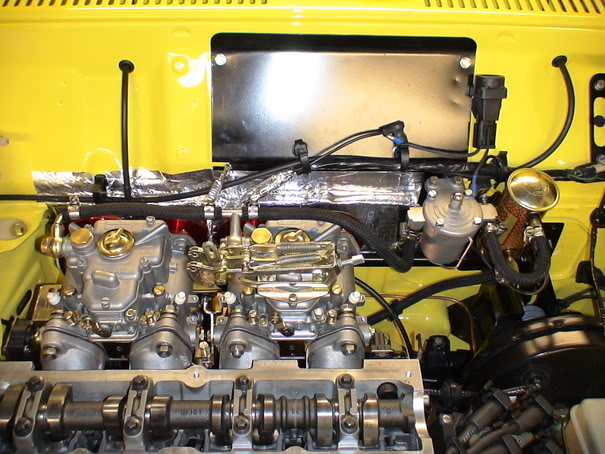

The fuel pipe is all connected, and the Omex wiring loom is ready to connect up to the throttle position sensor. All I need to do is connect up the link rod from the linkage down to the throttle lever, and that should be them finished.
I also got these through the other day.
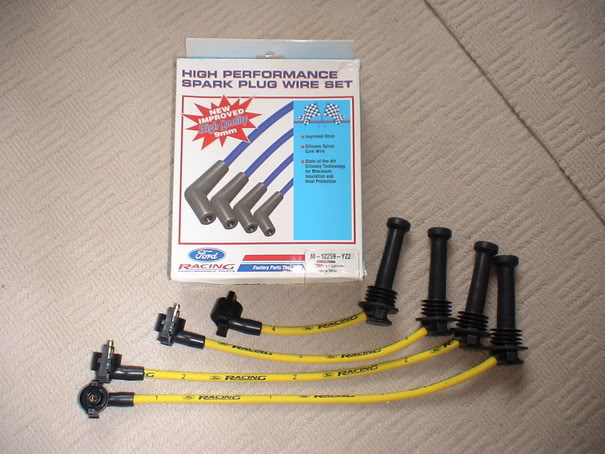
Ford motorsport racing 9mm yellow spark plug lead's. Very good quality as you would expect from Ford genuine part's.
I'm still waiting on a few bit's of powder coating, which hopefully I should get back sometime next week. I can then refit the gear linkage, and get the car back down on it's wheel's. I can then see about getting the car booked in to get the exhaust manifold down pipe's re-made.
Vacuum Hose
16th January 2006
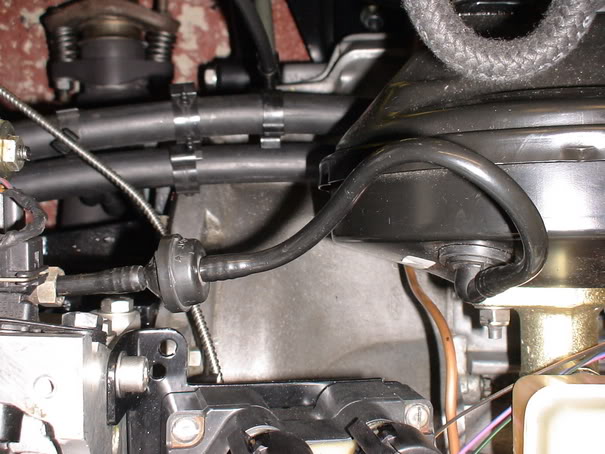
Im using the same vacuum pipe setup as on the standard CVH engine, but just alot shorter. Each end of the DCOE manifold there is a flat which you can drill out and tap with the correct thread to take the Ford vacuum hose fitting (14mmx1.5 pitch).
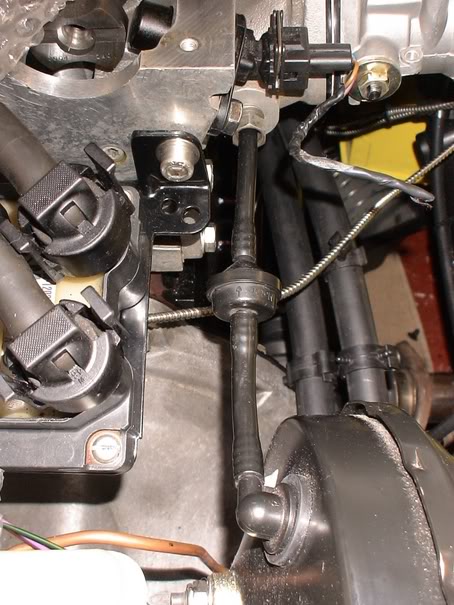
The one in the picture above I will need to re-make, as I have'nt allowed any play in the pipe incase the engine does move slightly. I've got plenty of new hose, so it's not problem.
Fuel Pressure Gauge
19th January 2006
Purchased a new inline fuel pressure gauge on a 8mm t-piece, and fitted it today.
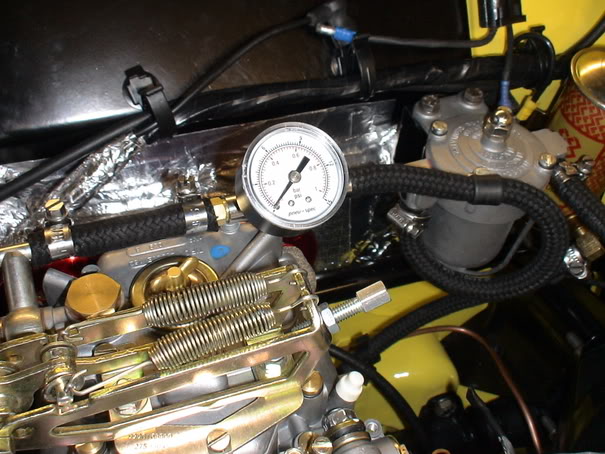
Just a easy way of getting the pressure correct for the DCOE's, and keeping a eye on them.
Plumbed in Fire Extinguisher
22nd January 2006
Got the latest batch of powder coating back friday. So now I could get the stabilser bar back in the gear linkage with the powder coated over aluminium bush, and fitted back on the car. Now the car's back on it's wheel's and I can look into getting the exhaust manifold finished.
I have from day one wanted to fit a plumbed in fire extinguisher. After the money spent and time on the car, it pay's to have the extra protection. So I purchased this, which came also friday.
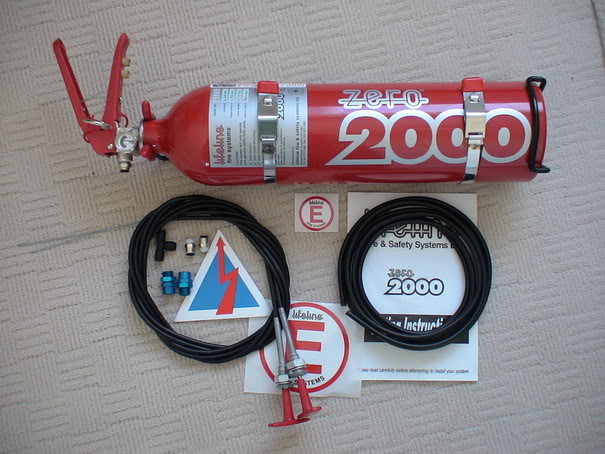
Brand new mechanical lifeline extinguisher. I read about this kit after Dave from perfromance Ford mag fitted it into his xr, and looked a nice bit of kit for the money. Now I wanted it to go behind the driver's seat as that was the only real available area free from obstruction and also free from the risk of accidentially setting it of.
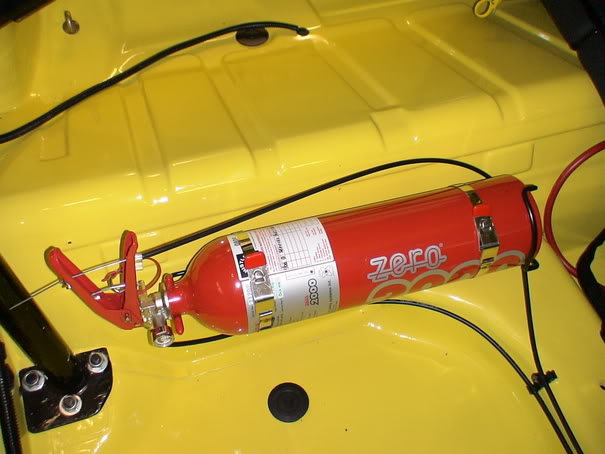
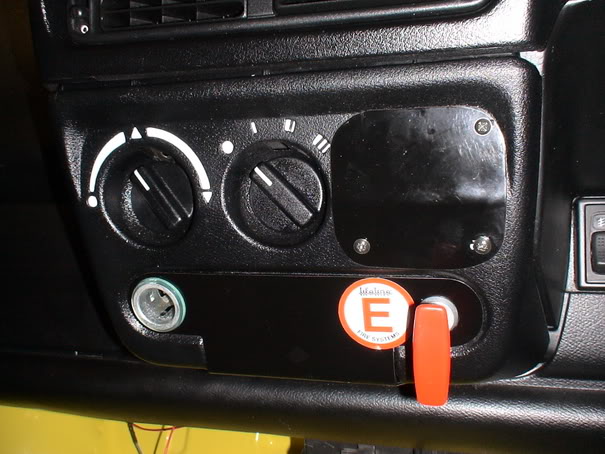
The mounting bracket was going to be fixed to the floor, but I found that it would be to close to the seat. So I moved it up onto the vertical area below were the rear seat would go. The pull lever and pipe work is being run along between the seat's. I added the longer 12ft pull cable which was cut down to size and run's along the center of the floor pan with the 6mm hose. The handle for the pull cable is fixed into the heater part of the dash panel, in easy reach of both seat's.
I've still got to make up a couple of bracket's to mount the two jet's supplied in opposite corner's of the engine bay. Then route the pipe round the engine bay.
I also re-made up my servo vacuum hose with a bend in it to allow some play if the engine move's.
I'm still having trouble getting the bar on the dcoe linkage correct, if anyone can supply a close up picture of how it fit's, I would be grateful.
Add a Comment
Page Last Updated: Saturday 18th of May 2024

