›
› Yellow Track Mk2 Fiesta XR2 Project
Yellow Track Mk2 Fiesta XR2 Project

Author: Robert Saunders | Photographer: Robert Saunders
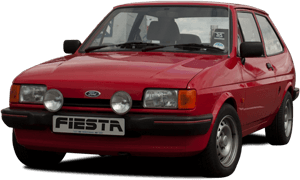
A Rare late registered G Plate Ford Fiesta XR2
15th April 2005 • 07:37PM
Well I thought it was about time I started a post on my long term project. Some off you may remember that I bought a G-reg mk2 Fiesta XR2 back in march 2003. I was after another XR2 but was trying to find one of the special editions, especially a XR2 40. But after a few months I gave up, then this came up local to me in a free paper. Totally standard and not messed about with and a rare G plater. After having a look and a drive, I had to have it.


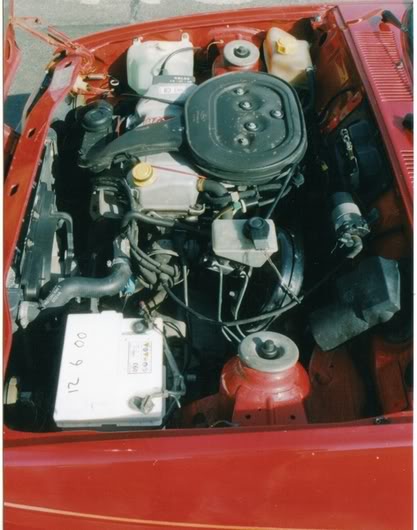
It only had two previous (same family) owners from new, and was used as the wife’s daily runabout. Was in very good condition with only minor wear and tear on it for what you would expect for that age car. I used it for a short while as a 2nd daily runabout, but the intention was to take it off the road and turn it into a dedicated trackday car!
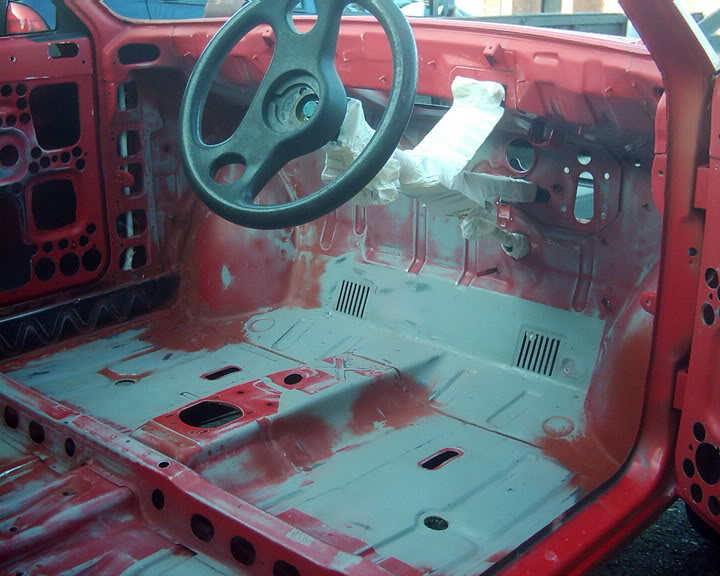
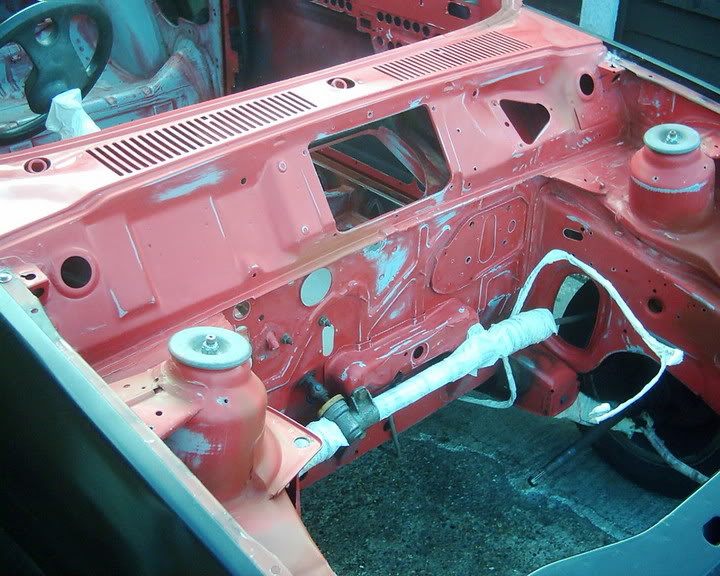
So at the end of 2003 it went into the garage for a serious rebuild. The first job to do was totally strip it down to a empty shell. The engine/box was removed and stored away (now in my black XR2), and the engine bay cleared. Then the interior was stripped, and then put onto axle stands and the complete suspension removed with fuel tank etc. Final job was the to remove the rest of the kit.
Now I had a shell up in the air, I could fully check it over to see the extent of the work needed. As you can guess the rot on it was allot more than I was expecting, the kit had done a very good job of hiding it.
It had gone in all the usual areas, front panel, inner wings (under battery tray, around both suspension turrets), bottom of inner wing near A-pillar, both front foot wells, interior sills, back of floor in front of rear seat, end of sills to rear arches, rear inner and outer arches and a couple of areas in boot floor. The worst area's were the rear arches. When I removed the kit and saw the rust, I must admit I thought it was to big a job for me and contemplated giving up. But I had done all the other welding myself (self taught), and said no I had to at-least give it a go.
The floor pan was in very good condition with only surface rust. A good clean up and this was ready for a good coating of under-body sealer and waxyoil. As the car is going to be used on the road, I wanted it to be well protected to avoid a repeat of any rot coming back.
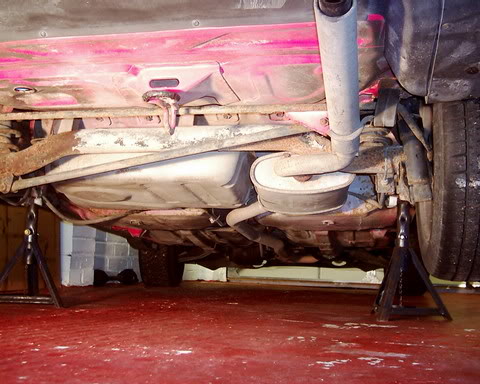
I will put up some before and after picture's of the main areas that needed cutting out and welding up;
Passenger inner wing.
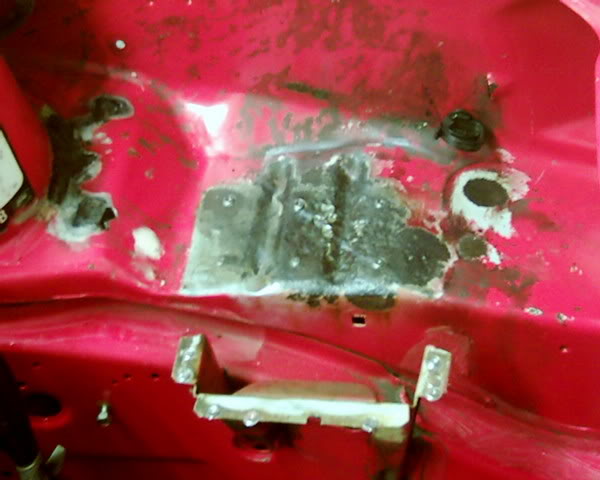
after

*Battery is going behind passenger seat.
Driverside inner wing.
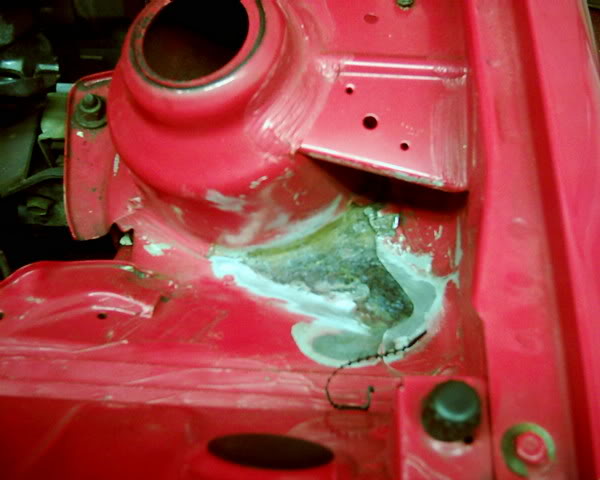
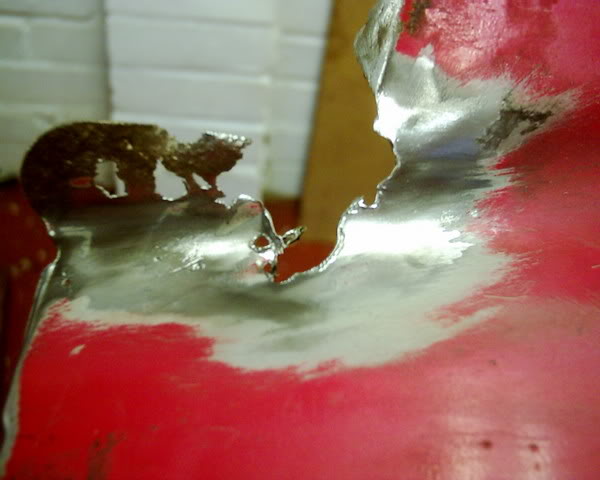
After
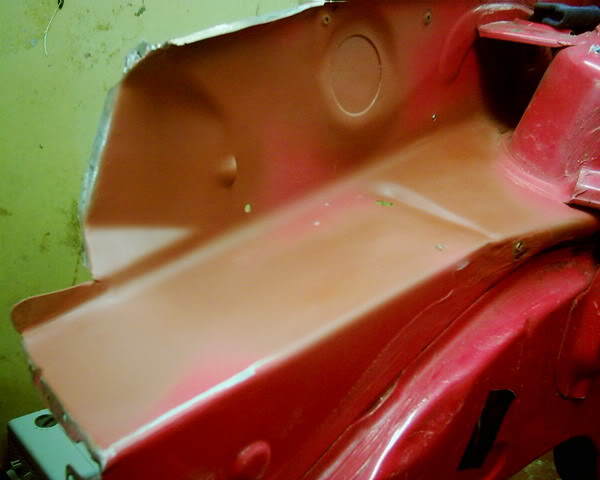
Bottom of inner wing/A pillar.
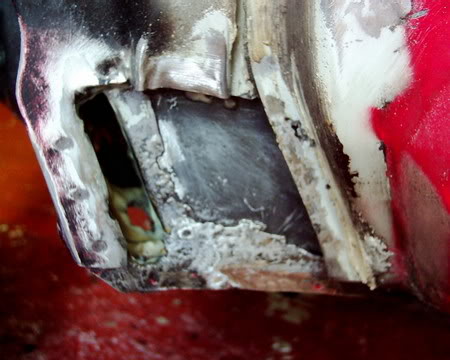
after
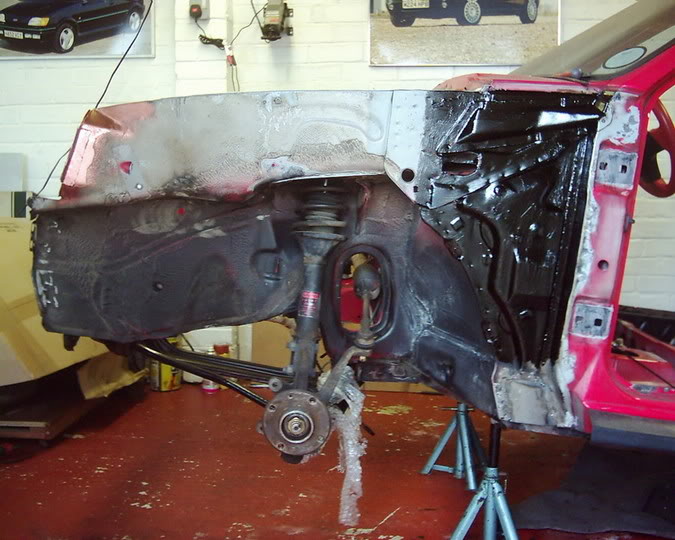
Front floor and interior sill's

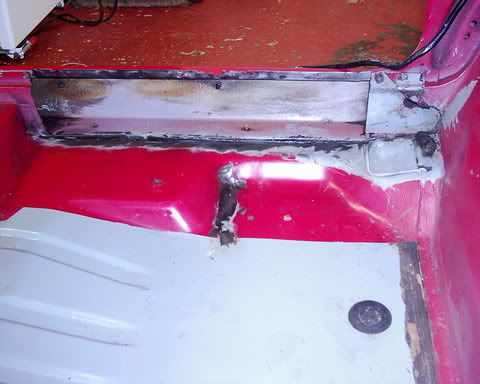
after
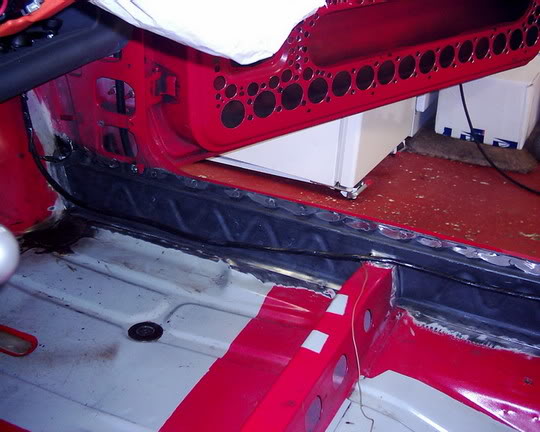
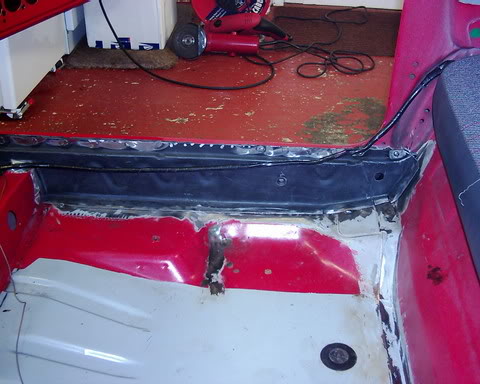
Rear arches
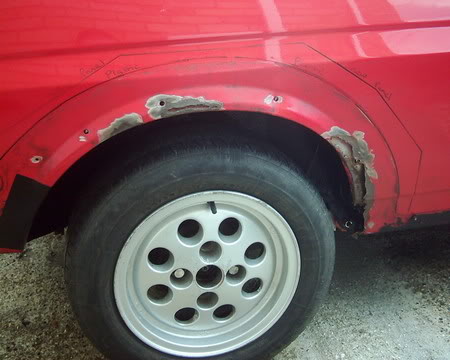
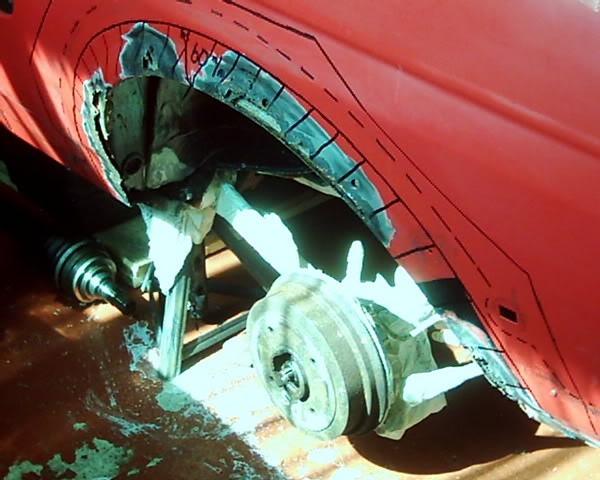
new inner arch in place
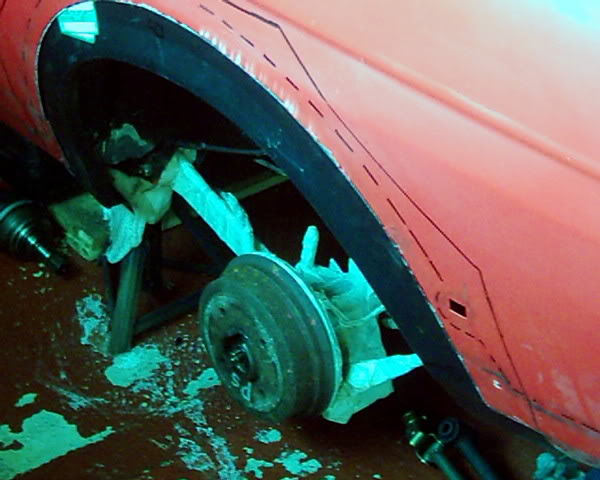
after
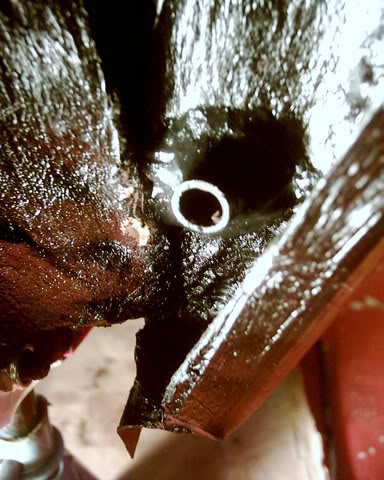
I also modified the sunroof drains so now they run outside the car, and not inside the sills rotting them again. Easy mod and well worth doing.
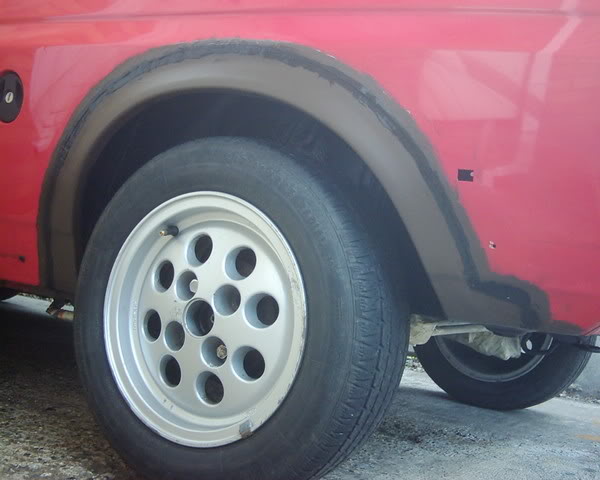
As can be seen in the previous pictures I removed both wings and the front panel. I then welded back in place genuine ford panels.
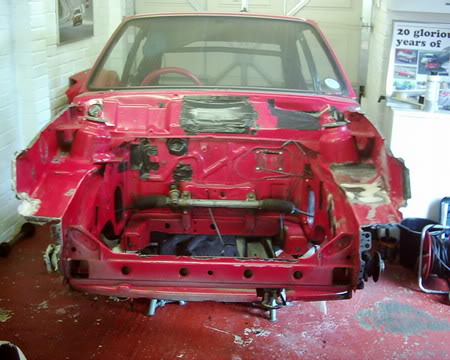
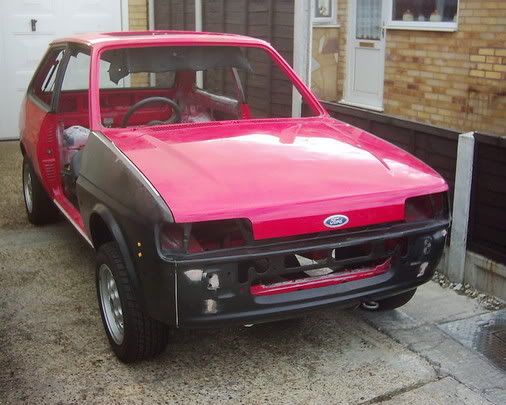
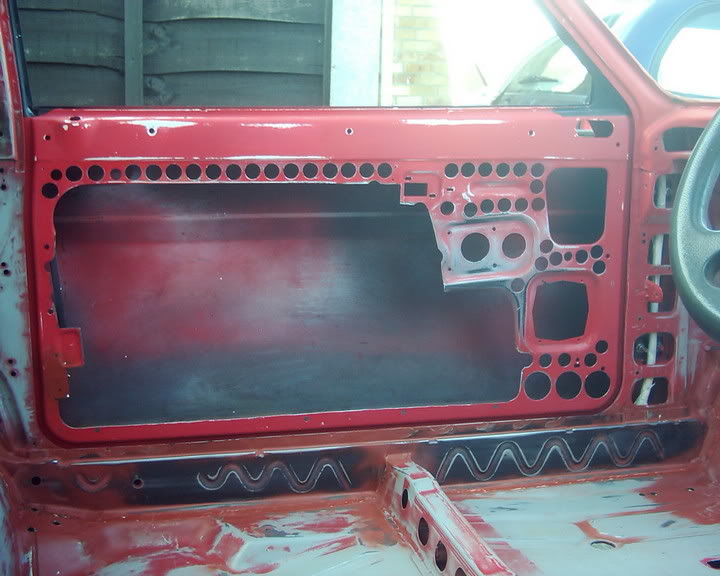
Now the shell was once again solid. I could have a look at the many other jobs that needed doing to the shell. As it's going to be a track car I wanted to loose as much weight as possible. The bonnet and tailgate have been binned and a new fibreglass bonnet skin and tailgate with internals was purchased. The bonnet is held on with pins and the tailgate has pins at the top but uses the original catch at the bottom. The doors were in very good condition but heavy. So out came the angle grinder and hole cutter, and I ended up cutting out most of the interior panel.
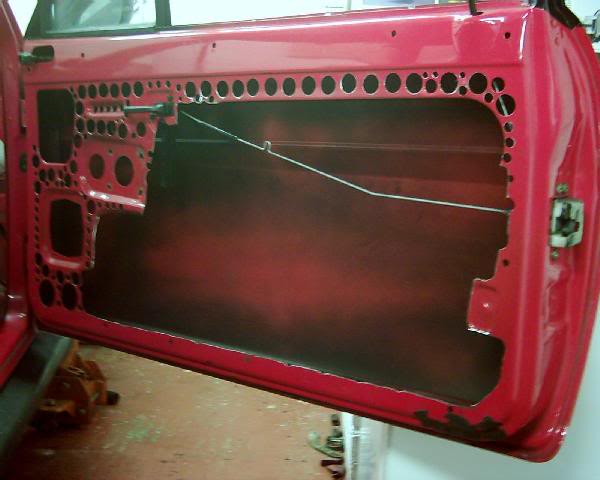
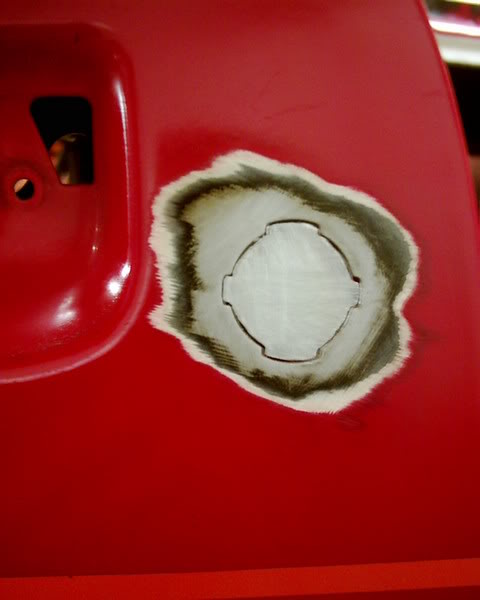
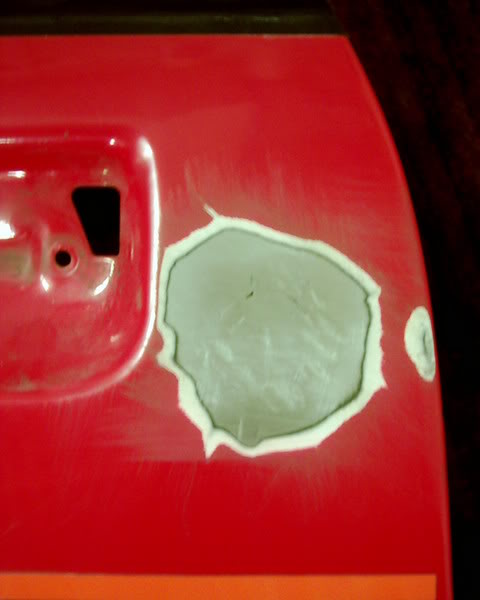
I've made up alloy door cards to cover up the inside panel which have been powder coated satin black. I also wanted to lose the door locks, so I made up a metal plate to fit exactly the shaped hole. Which was then welded in place and then flushed back, a skim of filler has been applied to finish off.
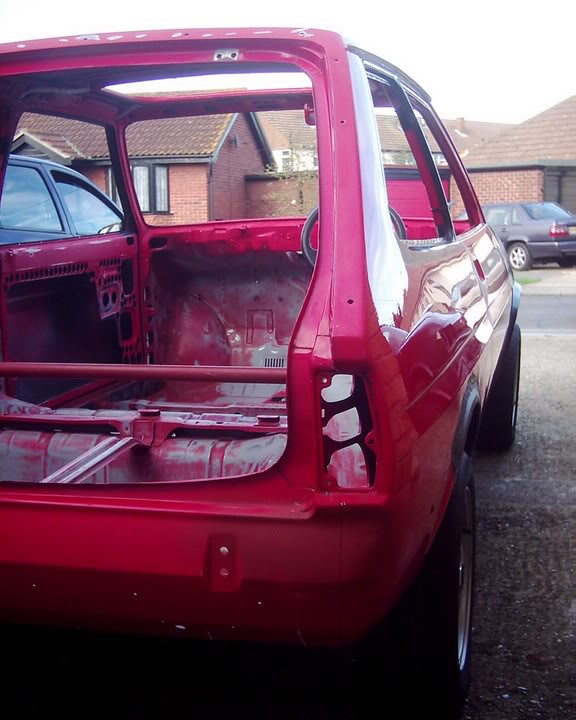
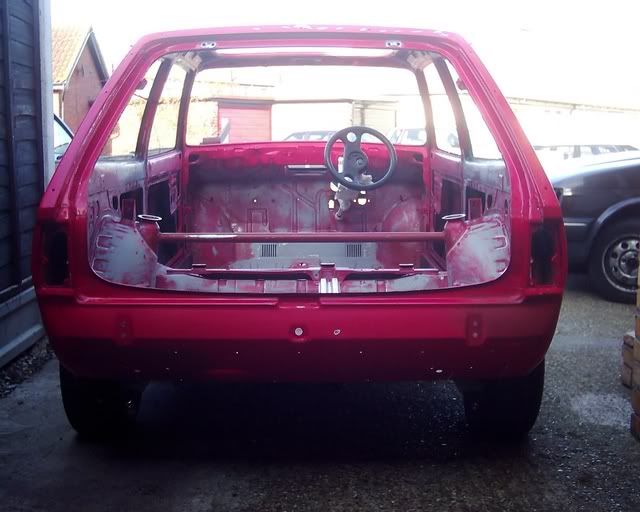
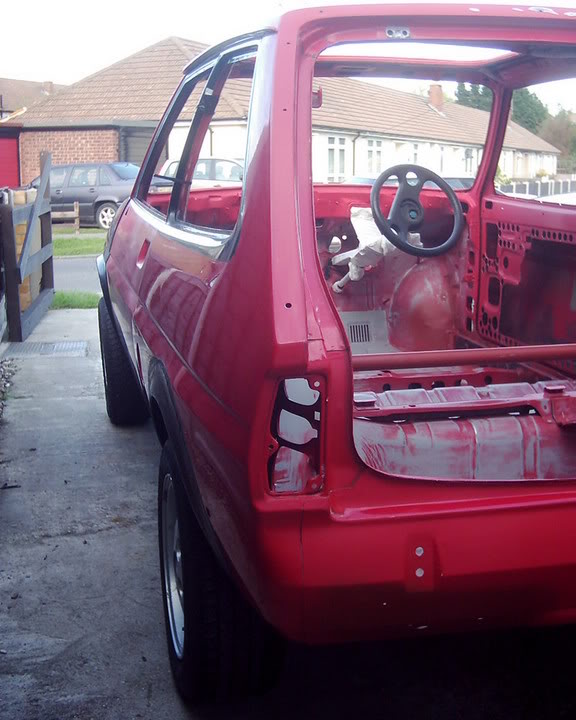
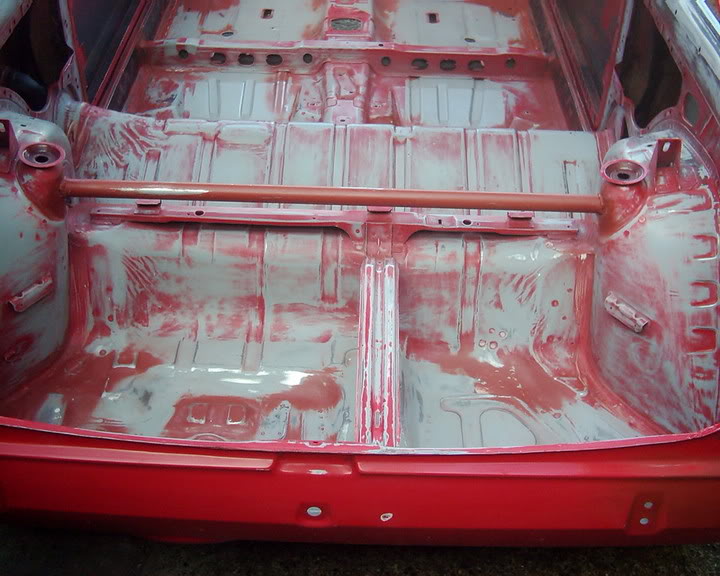
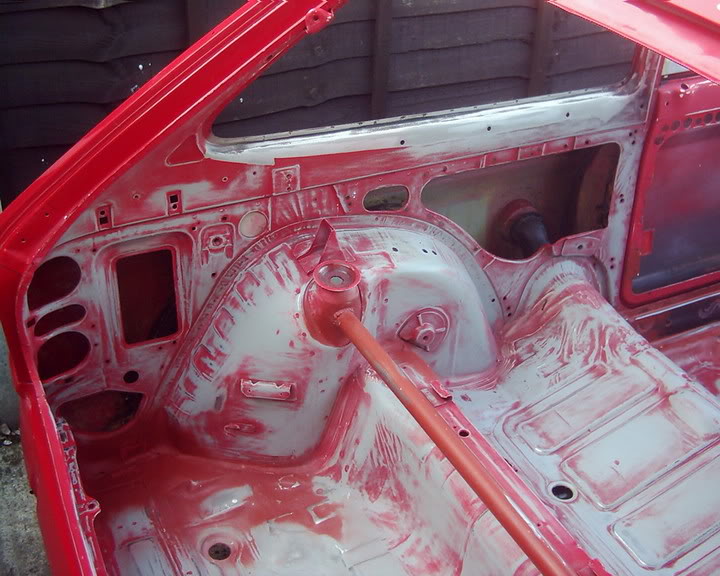
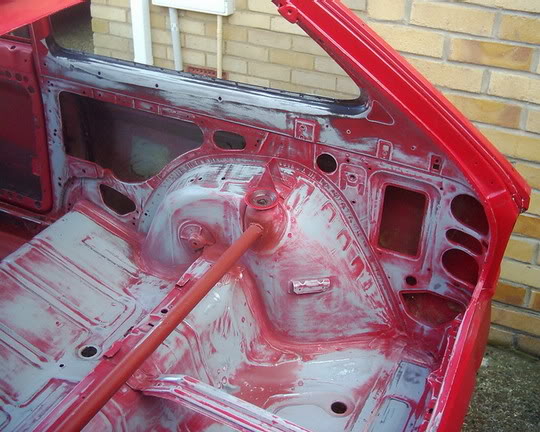
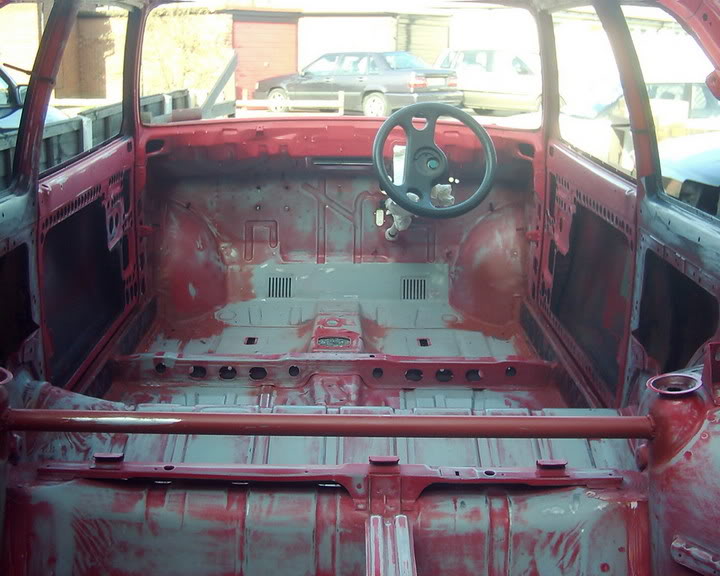
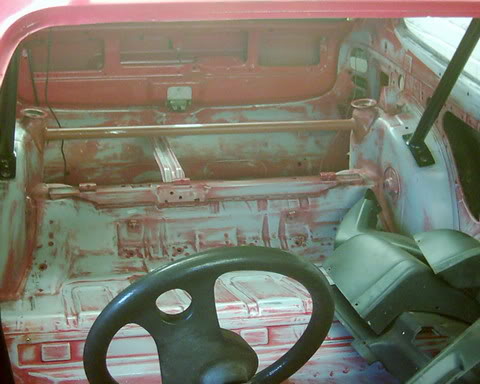
The tar pads from inside the car were removed, and the inside was then prepped myself for spraying. In the picture below you will also see a rear strut brace which I made and welded in place.
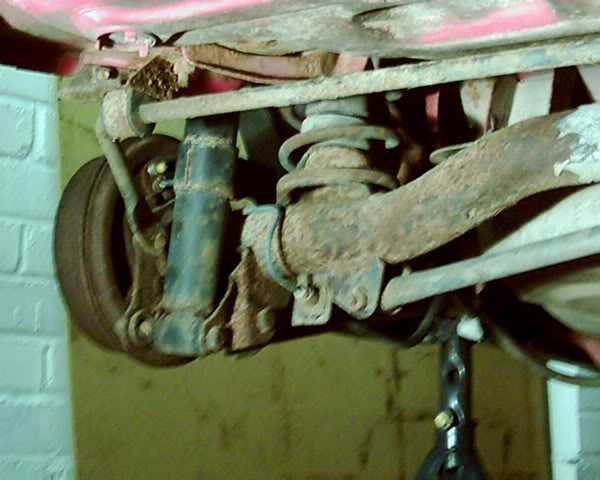
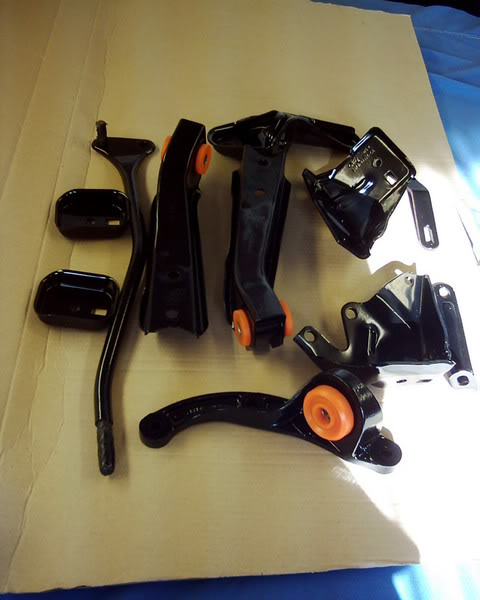
The car is now back down on its wheels with a fully powder coated suspension done in satin black. It also has a complete set of Deflex poly bushes fitted, and these were specially made in the harder compound. I also had the fuel tank powder coated and has been refitted. All the suspension has been covered to protect it when sprayed. Also the underside has had a couple of layers of black waxyoil under-body protection, with a extra layer of clear waxyoil on top. Suspension as seen on car when I purchased it.
Some part's powder coated.
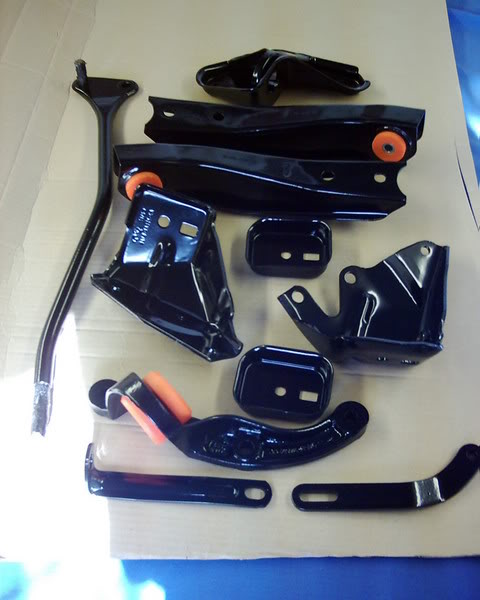
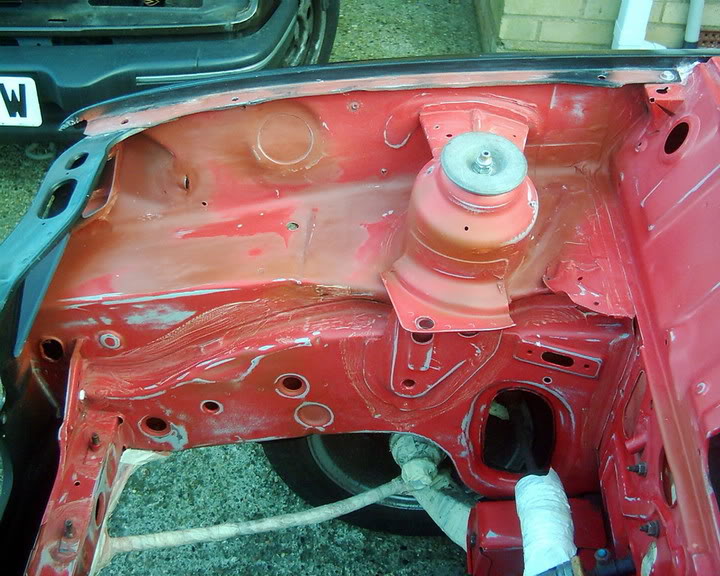
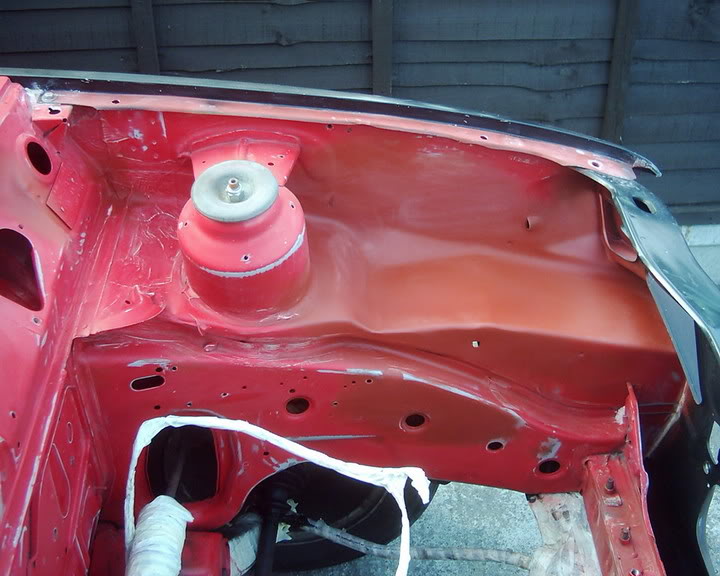
The engine bay has also been prepped by myself, but im leaving the outside to the bodyshop. The car is now going on Monday for a full respray, the only area that wont be repainted is the underside of the floorpan! I've got much more to add to this post, as I’ve been making bits for the car and modifying existing parts ready to go back in when I get it. But I think this is enough for today, I will keep this post updated regularly from now on. Rob.
Off to the bodyshop
18th April 2005 • 10:41AM
Just got back in from making sure the car got to the bodyshop ok. I reckon everyone who worked there came out to look at it. It's not everyday they get something as old or unusual as a mk2 Fiesta in to work on, quite a few of them had owned them years ago. One chap had 6 XR2's at one time. The bloke who will be prepping the rest of the car said that the inside had been done well, so that was cool. But it made me think perhaps I should of done the outside myself as well. They're planning on having it done for the end of the week. The outside of the car will basically look like a XR2 but with some mods. The standard bodykit/bumpers are going back on, but will be sprayed up with Halfords black plastic bumper paint, that has been recommended on here.
Now for the colour it's being painted, it's not staying red, but it is staying a standard Ford colour. It's a solid paint, and one that Ford hasn't used much. Some people will hate it, and others (hopefully) will like it. But at the end of the day I've always had a thing for car's this colour. And I wanted something to stand out, especially round the circuits. I will keep you guess'ing till the end of the week, when I hopefully get it back.
After putting so much effort and time into it I dont want it rotting away again, so it's had the full red oxide / waxyoil treatment. This will probably be the only time I do a full rebuild of a car, so I wanted to do a proper job and get things like panel gap's spot on.
In the end I've gone with Grays bodyshop ltd. It's a large insurance approved bodyshop, the MD seems a nice bloke and though it's not the type of job they do he was happy to take it on. I had a look round the bodyshop, and see some of the cars that had just been done, and I was very impressed with the quality. The price he quoted me was around what I was expecting to pay, so I let him have it.
Spec List and the Fiestas weight saving diet
23rd April 2005 • 09:58PM
Well as the bodywork is taking a bit longer than I was expecting, and now looks to be done for the end of next week. I thought I may as well update my thread and list the spec planned for the car. Most of the part's I have now got, and are waiting for the shell to come back and then re-fitted.
ENGINE
Standard 2.0 ltr silvertop Mondeo zetec engine, running a pair of Kent FZ2002 cams. Weber 45 DCOE's fitted with pippercross full radius ram pipes, and pipercross air filter. Facet silver top competition fuel pump, filter king regulator. Magnex stainless system, need to get a manifiold made. This will be controlled by a omex managment system which is one of the few items I still have to buy. This setup is listed at 175bhp with a standard engine, but as i will be fitting the performance cams I should get slightly more than this :wink: . S2 Escort turbo lsd gearbox fitted with uprated clutch kit, burtons quickshift linkage.
SUSPENSION
Leda front and rear 24 point adjustable shocks with there recomended springs. Deflex polybushes made in there harder race compound. All suspension powder coated satin black.
BRAKES and WHEELS
Willwood 4 pot calipers with big disc kit. Escort S2 turbo servo with MK4 Escort master cylinder, fitted with RS1600i brake fluid bottle. Braided lines. 15" alloys, 195/45/15 avon track day tyre's.
BODYWORK
My goal was to make the shell as light as possible without loosing it's strength and rigidity. Interior will be totaly stripped with only essential's fitted. Fibrelass bonnet skin and tailgate with internals, (alloy competition pins). Fully delocked door and tailgate. Polycarb windows thruout inc sunroof, (except front screen). Carbon/Kevlar bucket seat (genuine RS200 :shock: ) with Sabelt 6 point aircraft style buckle harness. Alloy door / rear quarter cards. Custom speedo pod. Full Safety devices cage with removable diagonal rear bar, door bars etc. Battery moved to behind passenger seat in battery box with battery fia cut off switch. As I said I removed anything that was'nt needed or could be lightened. Here is a list of all the bits that I removed which were taken to work and weighed on a set of accurate industrial scales. (in no particular order):
- Pair of complete door cards - 11Ib / 5kg.
- Various interior parts - 9.6Ib / 4.35kg.
- Carpet - 7.4Ib / 3.4kg.
- Sound proofing materials - 28.7 Ib / 13kg.
- Tar pad material - 10.7Ib / 4.9kg.
- Seat belt's - 12.21Ib /5.5kg.
- Bonnet catch+plate, 1 horn - 2.6Ib / 1.15kg.
- Parcel shelf & supports - 8.4Ib / 3.8kg.
- Removable boot floor & trim - 10.8Ib / 4.9kg.
- Spots & brackets - 2.9Ib / 1.3kg.
- Rear wiper motor, arm, bottle and hatchback cover - 5.2Ib / 2.35kg.
- Material removed from front bumper - 1.2Ib / 0.55kg.
- Interior heater rad and plastics - 2Ib / 0.95kg.
- Door metal removed - 5.7Ib / 2.6kg.
- Original battery tray & support - 1.9Ib / 0.90kg.
- Roof lining - 4.8Ib / 2.15kg.
This come's to a total of 125.11 Ib or 56.8 kg!!
Plus the other items that I have reduced in weight which I weighed before I started and once again when I had finished modifying it.
Window winder mech.
Before 1.9Ib / 0.85 kg.
After 1.6Ib / 0.75 kg.
Sunroof.
Before 10.1Ib / 4.6kg.
After 5.1Ib / 2.35kg,
Which is another 5.3Ib or 2.35kg.
Overall total so far is, 130.04Ib or 59.15kg.
And dont forget this doesn't include items like the original seats etc that were to big to take to work and weigh. Also the saving of the fiberglass panels and poly windows are a major weight saving. So allot can be saved by removing a bit from here and there. Obviously items like the rollcage will add back in allot of the weight, but I should have a very light weight car when it's finished. Thats about all for tonight, will update again soon.
Engine Clearance
24th April 2005 • 11:07AM
I had the engine/box in the bay over the winter just to try the 45's in there to check clearance etc. More than enough room to get some short trumpets and a foam style air filter in. I thought I may be up against the bulkhead and need to cut a section out :shock: , luckly I dont need to. This picture shows the longer trumpets that came with the new carbs. These have been changed for the pipercross items.
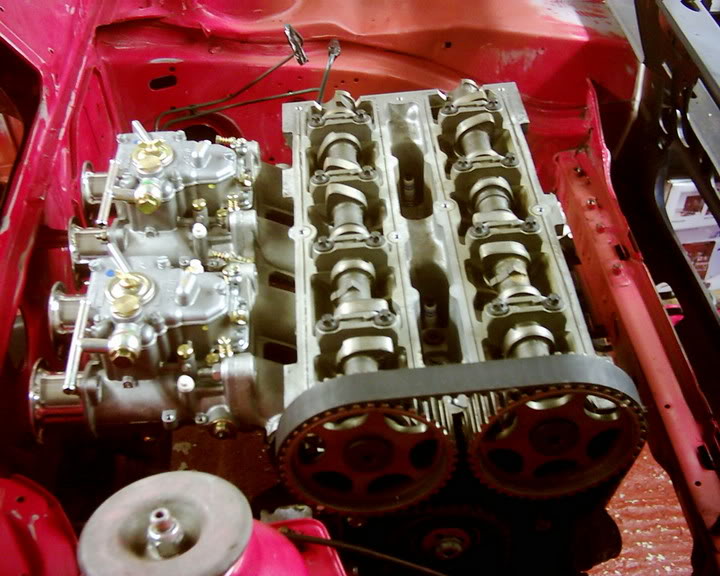
I need to reasemble the head with the kent cams, and bolt down on the block and then time it all up. It will then be ready to drop back in place.
More pre paint images
26th April 2005 • 11:13AM
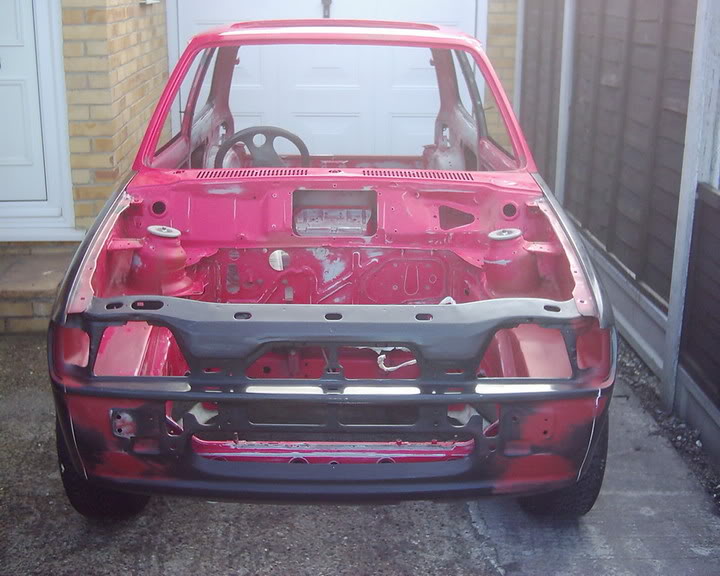
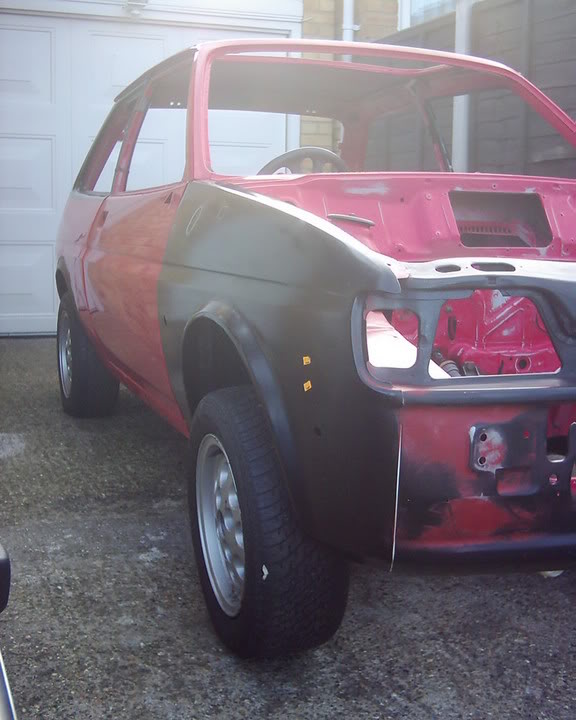
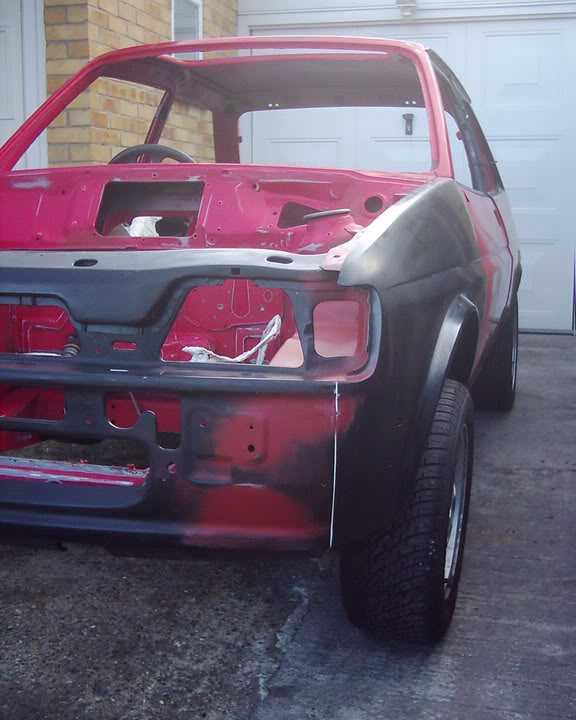
Just found the picture's of the car before it went to the bodyshop with the fiberglass panels still on. So I thought I would post them up.
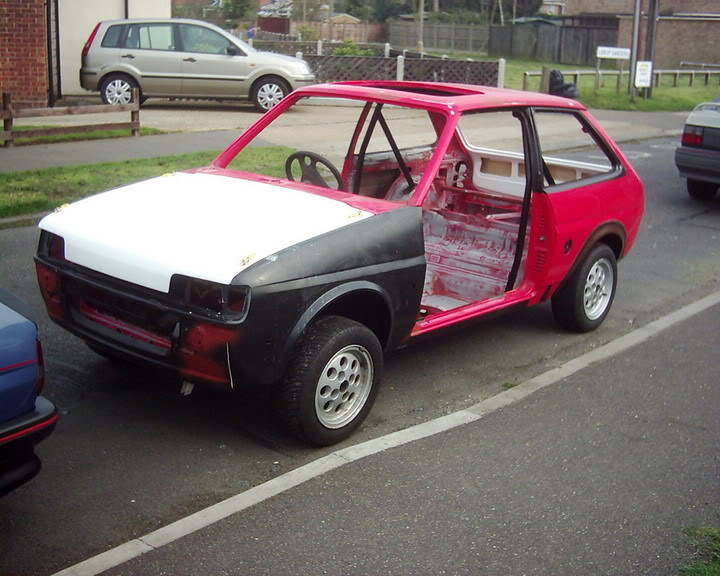

Another few shot's of the interior.


And finally the most upto date picture. Taken from the bodyshop on the way home from work. Had it's first coat of zinc rich base primer today. This will be blocked back and then a couple of coats of primer applied.
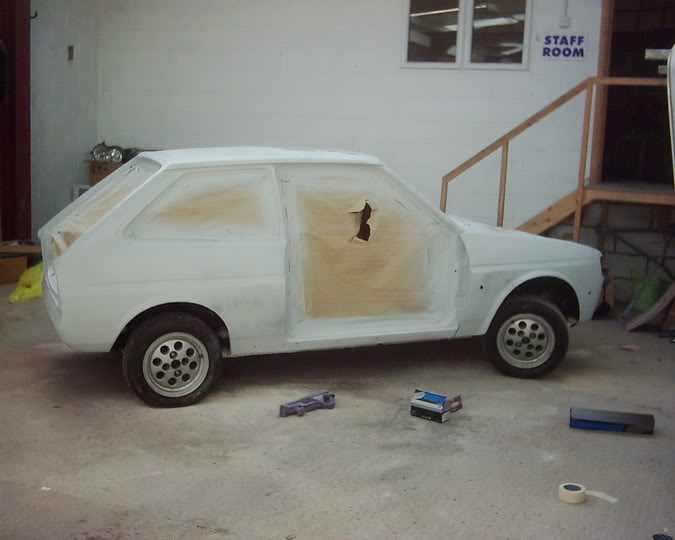
Fiesta Bodyshell is in Primer
10th May 2005 • 11:23AM
Well it's been 3 weeks today that the car has been in the bodyshop. Bit longer than the week it would take the MD told me, but I did say to them not to rush. But I now can't wait to get it back. But atleast it has given me time to finish spraying up the bodykit, and finish a few other jobs ready for when it comes back. Popped in today after work to have a look. The shell has now been painted fully in its top coat, and they have started to do the black round the rear quater glass area. I am really pleased with the paint finish and how shiney it is. This is even before it has been buffed up and lacquer applied. The doors, tailgate and bonnet are still in primer.


I've been told to pop back in thursday when all the car should be painted and the black area's done. I can then go over it and point out any areas im not happy with, as it will be easier to correct it then before the lacquer is applied. So hopefully in the next few days I should be able to put up some picture's of the finished job.
We have paint
24th May 2005 • 11:26AM
I had a call yesterday to pop into the bodyshop and have a look as they had finished spraying the car. They wanted me to check it over, and if I found anything I thought wasn't correct, to let them now so they could put it right. The finish already on the car is very deep and shiny, even before he's buffed it all over. And looking down the sides of the car at the reflection its dent and ripple free so I was well pleased. Well I couldn't find much thankfully, and what I did find i've been told will go when they 'block' it off and mop it back. So hopefully in a couple of days I should get another call to say it's done, and for me to have a final check over. It would be nice if I get it back for this weekend as it's a bank holiday, so more time to start putting bits back onto it. Just got to wait for the phone call.
Add a Comment
Page Last Updated: Monday 18th of June 2018


